In which our heroine turns this gorgeous ruby silverbeet into scrummy Kiwi Poise (New Zealand for “pies”) and explains how to improvise cake flour.
Pie is as New Zealand as, well, pie. The New Zealand pie is a cut above American pot-pies, which often only have one crust and a fairly soupy filling. Here in New Zealand, and in that other country over the ditch, pies are self-contained in a flaky, almost puff pastry, crust with a gravy filling. They are finger food, like Cornish Pasties. Only they aren’t Cornish, and they aren’t pasties. Your typical kiwi poi is meat-filled — beef, lamb, or chicken. There are veggie poise, but they tend to involve pumpkin and kumara, which are not well-loved in our household.
I’ve been developing my kiwi pie technique for a while now.

My Hobbit Pies with Mushrooms, carrots, celery and cheese
Typically, I’ve filled them with rich mushroom and cheese fillings. Just the ticket for cold, rainy Wellington winter nights. But it is high summer here, and I wanted to make a pie that was lighter, less stodgy, but still had plenty of flavour to stand up to the rich, sour cream pastry.
Last Saturday morning, on my weekly foray to the Riverbank Market in Lower Hutt, an enormous, shiny ruby silverbeet (a sort of mutant chard) called to me from across the carpark. While silverbeet is botanically chard, it has a whole different attitude from your Frenchified, Northern Hemisphere chard. True, the flavour is the same. The big difference the size. Silverbeet can whoop chard’s ass! You can’t really buy a small silverbeet. It also has thicker, but also more edible stems and veins. There is very little waste from a silverbeet.
I wanted my slow-cooked Silverbeet to be the star of my pie, but it needed a little something to give the filling some heft. Enter: sautéed cremini mushrooms. A bit of Te Aro Swiss cheese from the Kapiti Coast, and I was good to go.
I have a lifelong, love-hate relationship with pie crust. Mom was a pasty wizard. Especially sweet short crusts. Her German apfelküchen was legendary. Ditto the fig and plum pizzas she made with the annual windfall from Dad’s fig tree. My conscience wouldn’t let me use frozen pie crust from the supermarket, but my pies always look like I make them with my feet. My friend Judy and I took a pastry course at L’Academie de Cuisine in Bethesda, Maryland a few years ago. Thanks to that investment of time and money, I can make a plausible patê brissée and a kick-ass puff pastry. And passable croissants — which in my kitchen will always be crescent-shaped.
But neither are quite right for kiwi pie — one is too crunchy and the other too rich.
Here I have to confess to not entirely inventing my pie. A year or so ago, I found a recipe on food.com called “My Gran’s Sour Cream Pastry” posted by Zurie. Thank You Zurie! You can find the original recipe here: http://www.food.com/recipe/my-grans-sour-cream-pastry-197151.
I’ve memorised Zurie’s awesome pastry by now because it is the perfect pastry for Kiwi pie. The only problem is that Zurie’s recipe calls for cake flour, which doesn’t exist here in New Zealand. So, back I went to The Food Substitutions Bible. There, I learned that you can substitute 1 cup of cake flour with 1 cup of all-purpose/standard grade flour, minus 3 tablespoons, plus three tablespoons of starch. I use potato starch (or potato flour), but you can also use cornstarch. The first time I tried this, the results were so-so.
The thing about cake flour is that it is really fine and light: a cup of all purpose flour weighs 5 ounces or 142 grams; a cup of cake flour only weighs 4 ounces or 113 grams. That’s a pretty big difference. So, here’s what I do:
- Measure out 142 grams of all-purpose flour
- Remove 3 Tablespoons (27g) of flour
- Add 3 Tablespoons of (27g) of potato starch/flour or cornstarch/cornflour
- Sift together at least 5 times
- It will weigh a bit more than the equivalent amount of cake flour, but distributing the starch this evenly ensures that the texture will be pretty close to the real thing.
- I wish I had known this before I bought all those boxes of Swan’s Down flour that I never finished and had to throw away when they got weevils.
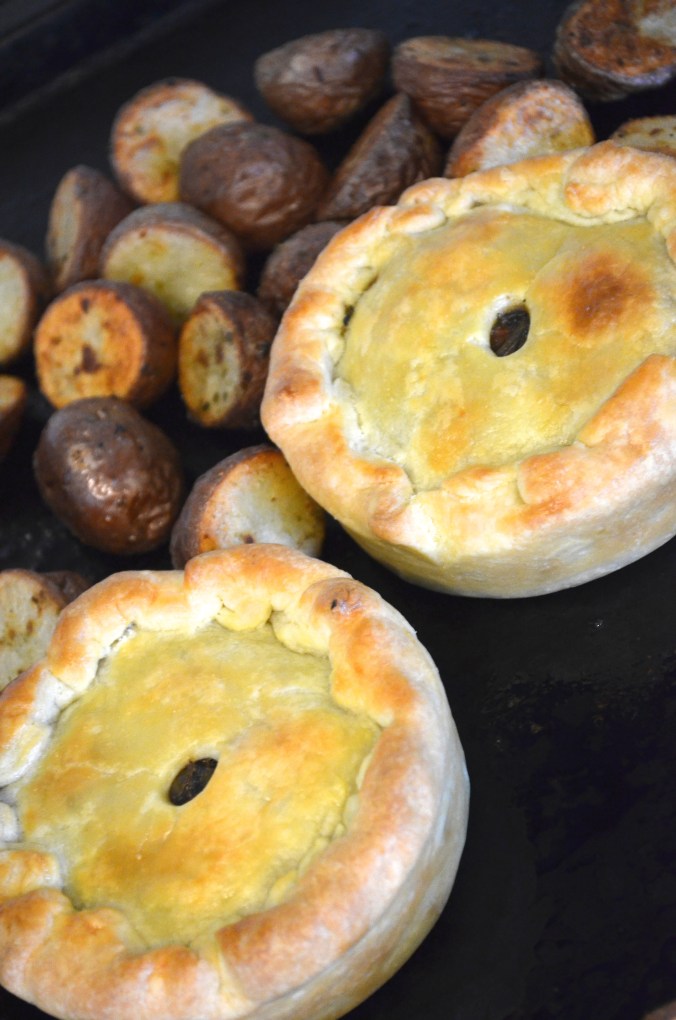
We normally have our pie with mashed potatoes and gravy (because they haven’t invented the food that doesn’t go with mashed potatoes and gravy). But since it is summer, I decided to roast some baby red potatoes to go alongside instead. Tonight we are having the leftovers — with mashed potatoes and gravy. Summer be damned!
Mushroom and Silverbeet Kiwi Pie

Makes enough for six single-serving pies.
For Zurie’s Gran’s Sour Cream Pastry:
2 1/2 cups of cake flour, or cake flour substitute
1 tsp kosher or sea salt
1/2 lb (250g) well-chilled butter, cut in small bits
1 cup (250ml) sour cream
- In a food processor with the steel blade, combine the flour and the butter. The butter should be really cold.
- Pulse several times until the mixture reaches a cornmeal like texture
- Add the sour cream and process again until a ball of dough forms. You’ll want to stop and scrape down the sides once or twice.
- If the dough is dry, add a teaspoon of vinegar. I’ve never had to do this, though.
- Remove the dough onto a floured surface and form into a flat disc. It will be fairly sticky. Handle it as little as possible.
- Wrap the dough in cling film and put it in the coldest part of your fridge to rest overnight.
For the Filling:
1 large silverbeet (or about 2 average bunches of ruby chard if you are not fortunate enough to live in New Zealand), stems chopped fine, leaves rolled and cut into thin strips
2 shallots, chopped
1 medium leek, chopped
2 cloves garlic, chopped or put through a press
a handful of chopped fresh dill (or a teaspoon of dill weed)
a sprig of fresh thyme (or a pinch of dried)
3 or 4 roma tomatoes, coarsely chopped
1 1/2 cups of vegetable stock or water
1 dried chili
1 bay leaf
1/2 lb cremini mushrooms, sliced
1/4 lb (113g) grated swiss-type cheese
1/4 cup (59ml) olive oil, divided
salt and freshly ground black pepper to taste
1 recipe of sour cream pastry
1 egg
I made the silverbeet part of the filling in the slow cooker the day before I planned to assemble and bake the pies. This gave all the flavours a chance to marry.
- Chop the shallot, leek, and garlic and microwave together with 2TBSP of the olive oil for 2-4 minutes, until they start to turn translucent. Transfer to the slow cooker.
- Add the finely-chopped silverbeet stems, along with the tomatoes, dry chill, bay leaf and dill. Sprinkle with about a 1/2 tsp of salt.
- Add as many of the silverbeet leaves as you can, sprinkle with a bit more salt and pepper. Don’t worry if you can’t get it all in. You can add the rest later as the stew cooks down.
- Add the stock and turn the slow-cooker to low for about 2-4 hours, adding greens if you need to as the stems cook down.
- I like my greens cooked down until they are really soft and creamy, so I left them on for about 4 hours. If you like your greens more al dente, they’ll only need a couple of hours. Just taste as you go.
- Mine were so delicious that I tasted about half the pot before they finally got into the fridge to rest. Luckily, I only needed about three cups of the greens for the filling.
- On the day, sauté the sliced mushrooms in the remaining 2 TBSP of olive oil. Season them well with salt and pepper.
- When the mushrooms are cooked well, stir in 2 TBSP potato starch or flour and continue to cook for a couple of minutes.
- Stir in about 3 cups of the greens with their broth and simmer with the mushrooms until they form a nice, gravy-like filling.
Preheat your oven to 425/210.
Now, Assemble your Pies!
I have a handy baking pan that was designed for baking hamburger buns (which I never do) and is just right for baking single-serving pies. If you don’t have one, and you love pie, you should probably get one. Or you could use ramekins, or single serving pie tins. Mine hold a 1/2 cup and a little bit of filling each.
- Get your very well-chilled pastry dough out of the fridge and cut it into 2 or 3 pieces. Rewrap the ones you aren’t using right away.
- Now, this is the fun part! On a well-floured surface, take your first chunk of dough and bash it over and over and over with a rolling pin until it is about 1/4 inch (1/2cm) thick. You’ll want to change directions (bash in a sort of x pattern). This loosens up the dough without warming it up too much.
- Repurpose your rolling pin, now, and use it to roll the pastry out until it is about 1/8 inch (1/4 cm) thick, or however thick you like your pie crust.
- Line the pie pans with crust, leaving and inch / 2cm or so over hang.
- Put a shaving of the swiss cheese on the bottom, enough to cover the dough. This will help keep the bottom crust from getting soggy.

- Put the pan in the fridge to rechill for 1/2 hour or so.
- Fill each crust with 1/2 cup or so of the filling you can mound it up a bit in the middle, if you like.

- Roll out dough for the top crusts. I cut the top crust to be the same diameter as the top of the pie pan, and poked a vent in the middle. Put this over the filling, so the whole thing looks like this:

- Crimp the overhanging dough up and over the edge of the lid. This way, the filling won’t leak out the sides, and you can over-stuff your pie, if you want.

- Now, make an egg wash with an egg and a little ice water and brush the tops of the pies.
- And they are ready to bake. Start them in a very hot oven — 425F/210C — for the first 15minutes, then turn the heat down to 375F/190C and bake for an additional 20 minutes or so, until the pasty is nice and golden brown.

- Let them cool a few minutes before you take the pies out of the pans. If you want, you can put them back in the oven on a cookie sheet to crisp up the bottom and sides. I just put them on the pan I was roasting the potatoes on. They don’t need long, maybe an additional 5 minutes or so.