Improvise and Overcome

008 Counting in Kiwi - Number 8 wire, that'll sort it

Kiwis take great pride in what they call their “number 8 wire” mentality. In a small, remote country peppered with small, remote communities, specialised materials can be hard to find. So, Kiwis have learned to make do. A Kiwi bloke, it is said, can fix anything with a piece of number 8 fencing wire. Kiwis are proud of their ability to improvise, adapt, and overcome.

When an earthquake knocked down Christchurch, they built a shopping mall out of shipping containers and a cathedral out of cardboard.

My Dad had a bit of the number 8 wire mentality. The wife wants a $1000.00 Tiffany lampshade for Christmas? Make one out of chicken wire and coloured glass. CCI02062016Dragged your feet until all the Christmas trees are gone (Southerners put their trees up the day after Thanksgiving)? Build one out of dowels and holly branches from the garden. The wife flushed a toothbrush down the toilet and got it stuck in the U-bend? Take the toilet out onto the driveway and melt the toothbrush with your blow torch.

Okay. That last one didn’t work out so well. Turns out ceramic toilets can catch fire. Which it did, burning for several minutes (long enough for neighbours to come gawp from far and wide) before breaking in half. Try living that down. I hear someone related that story, to gales of laughter, at Dad’s Memorial Service. Oh. Wait. That was me.

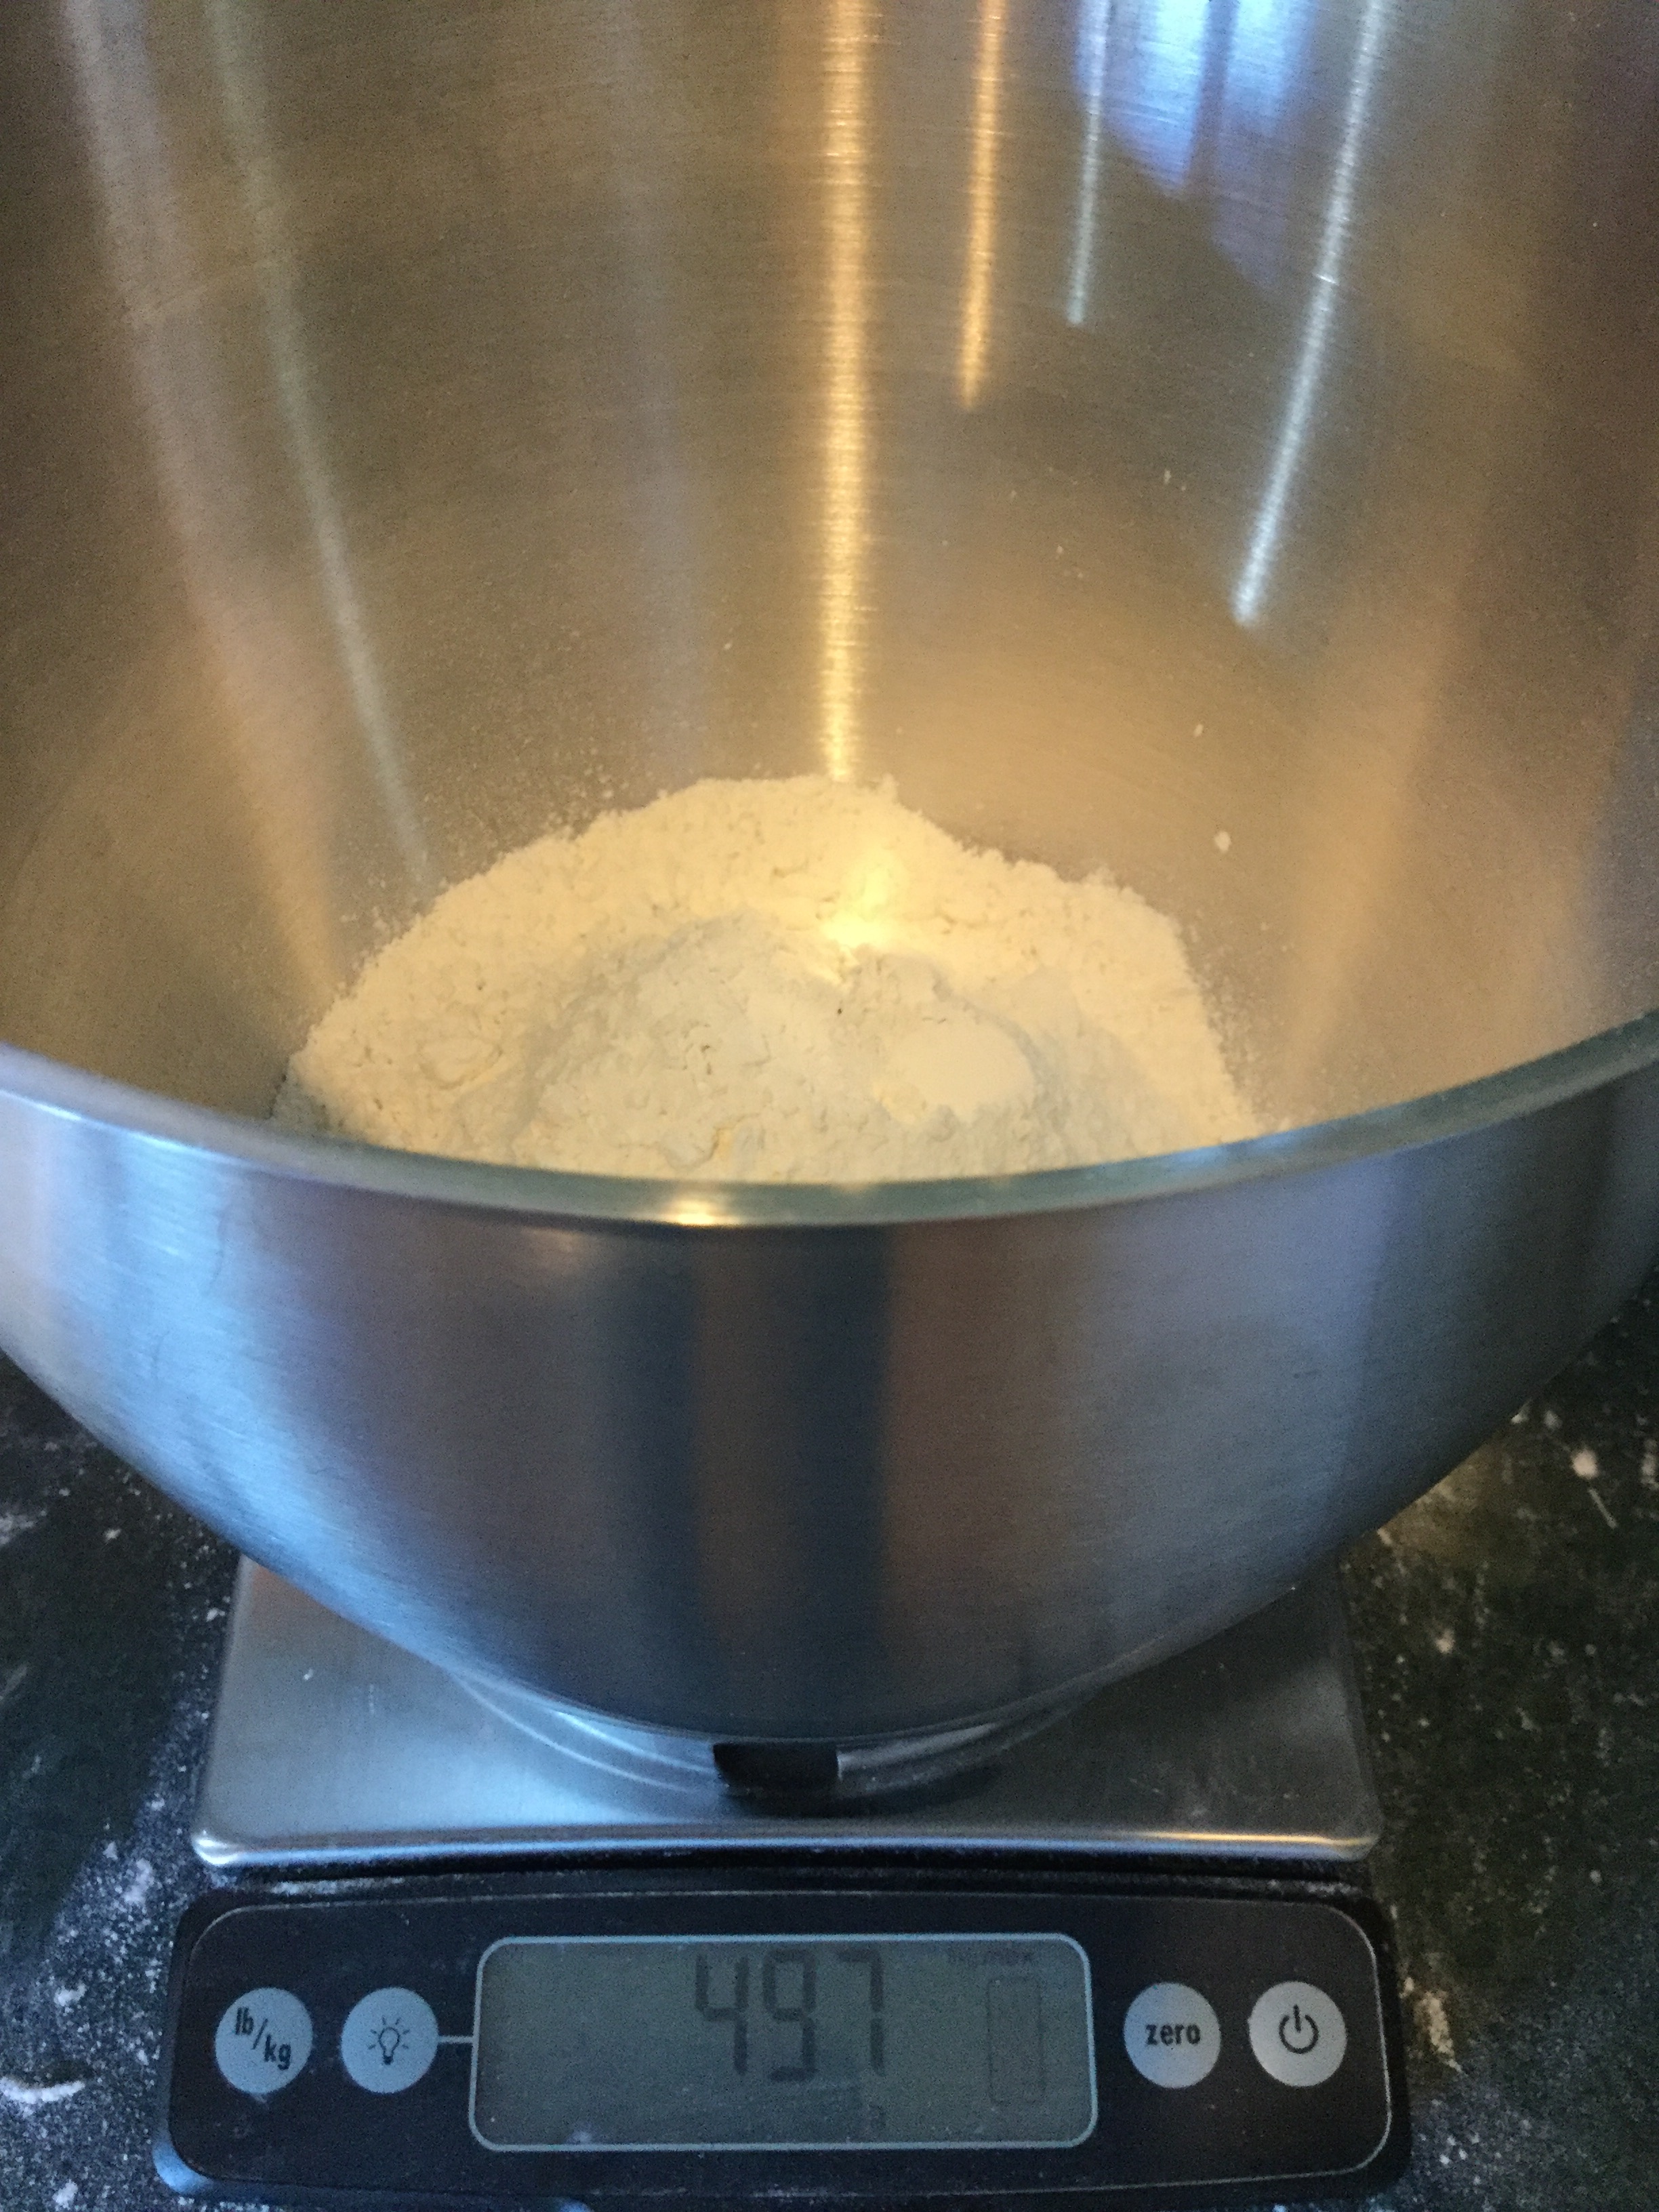
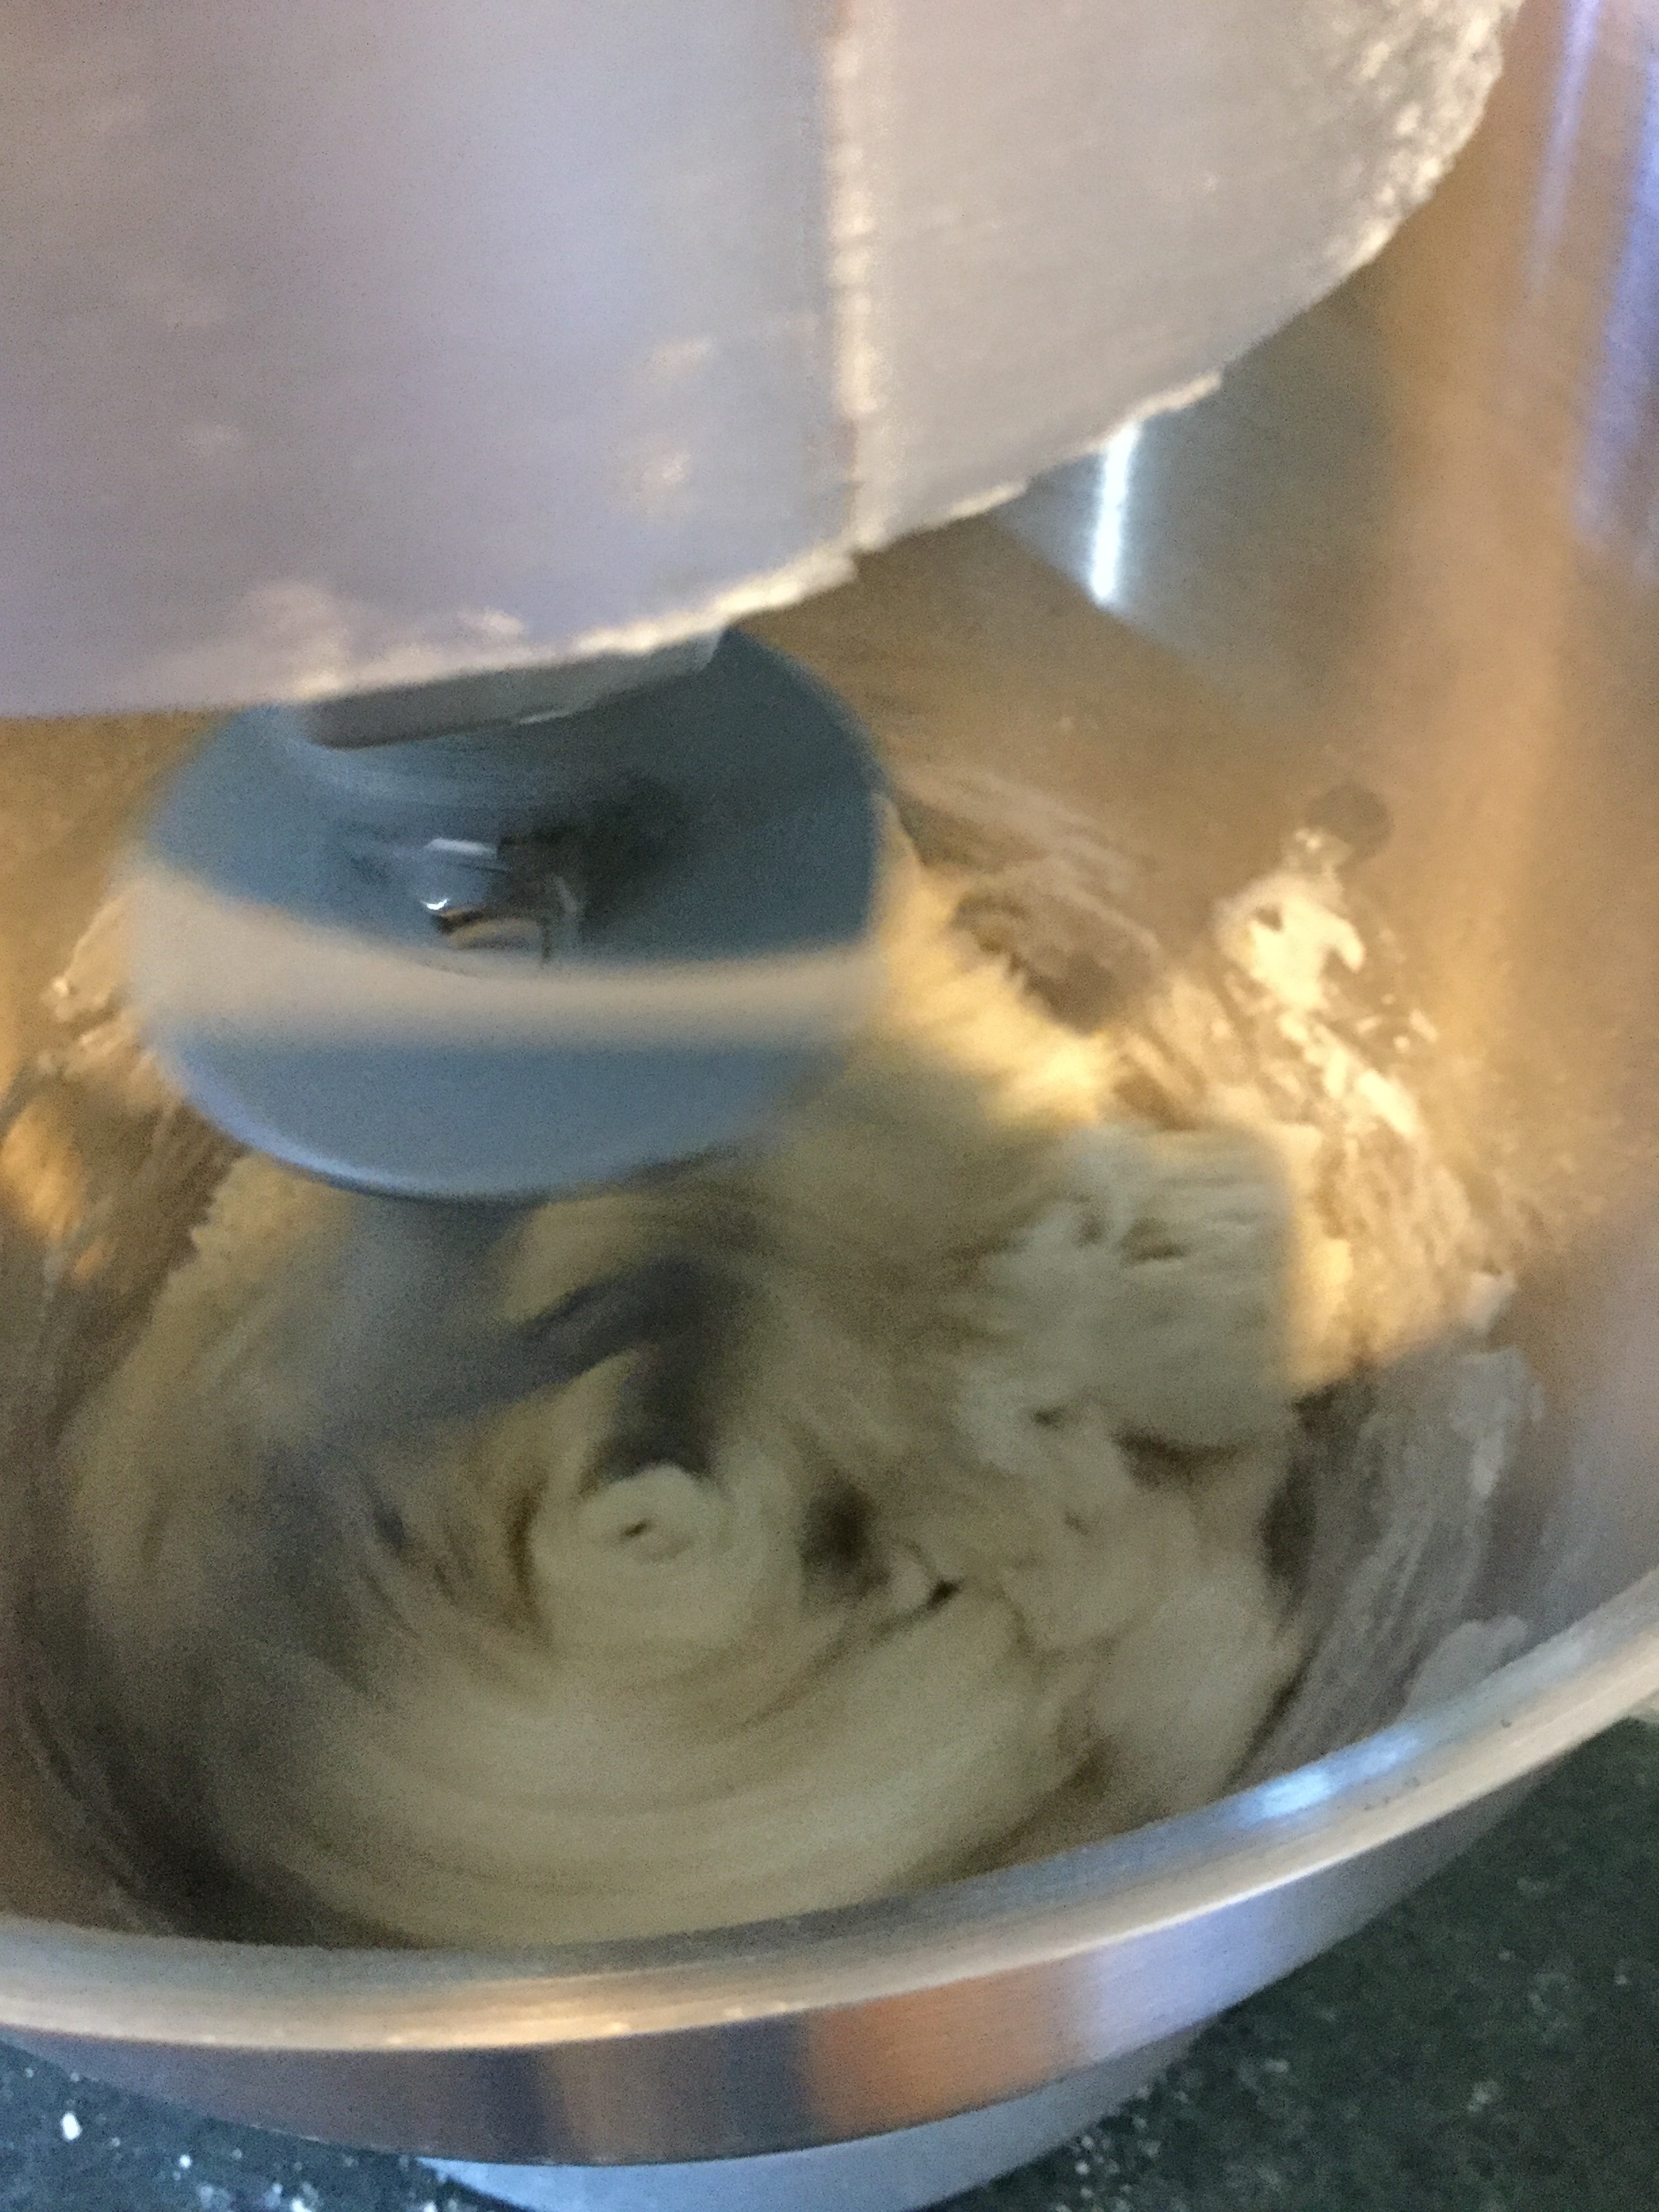
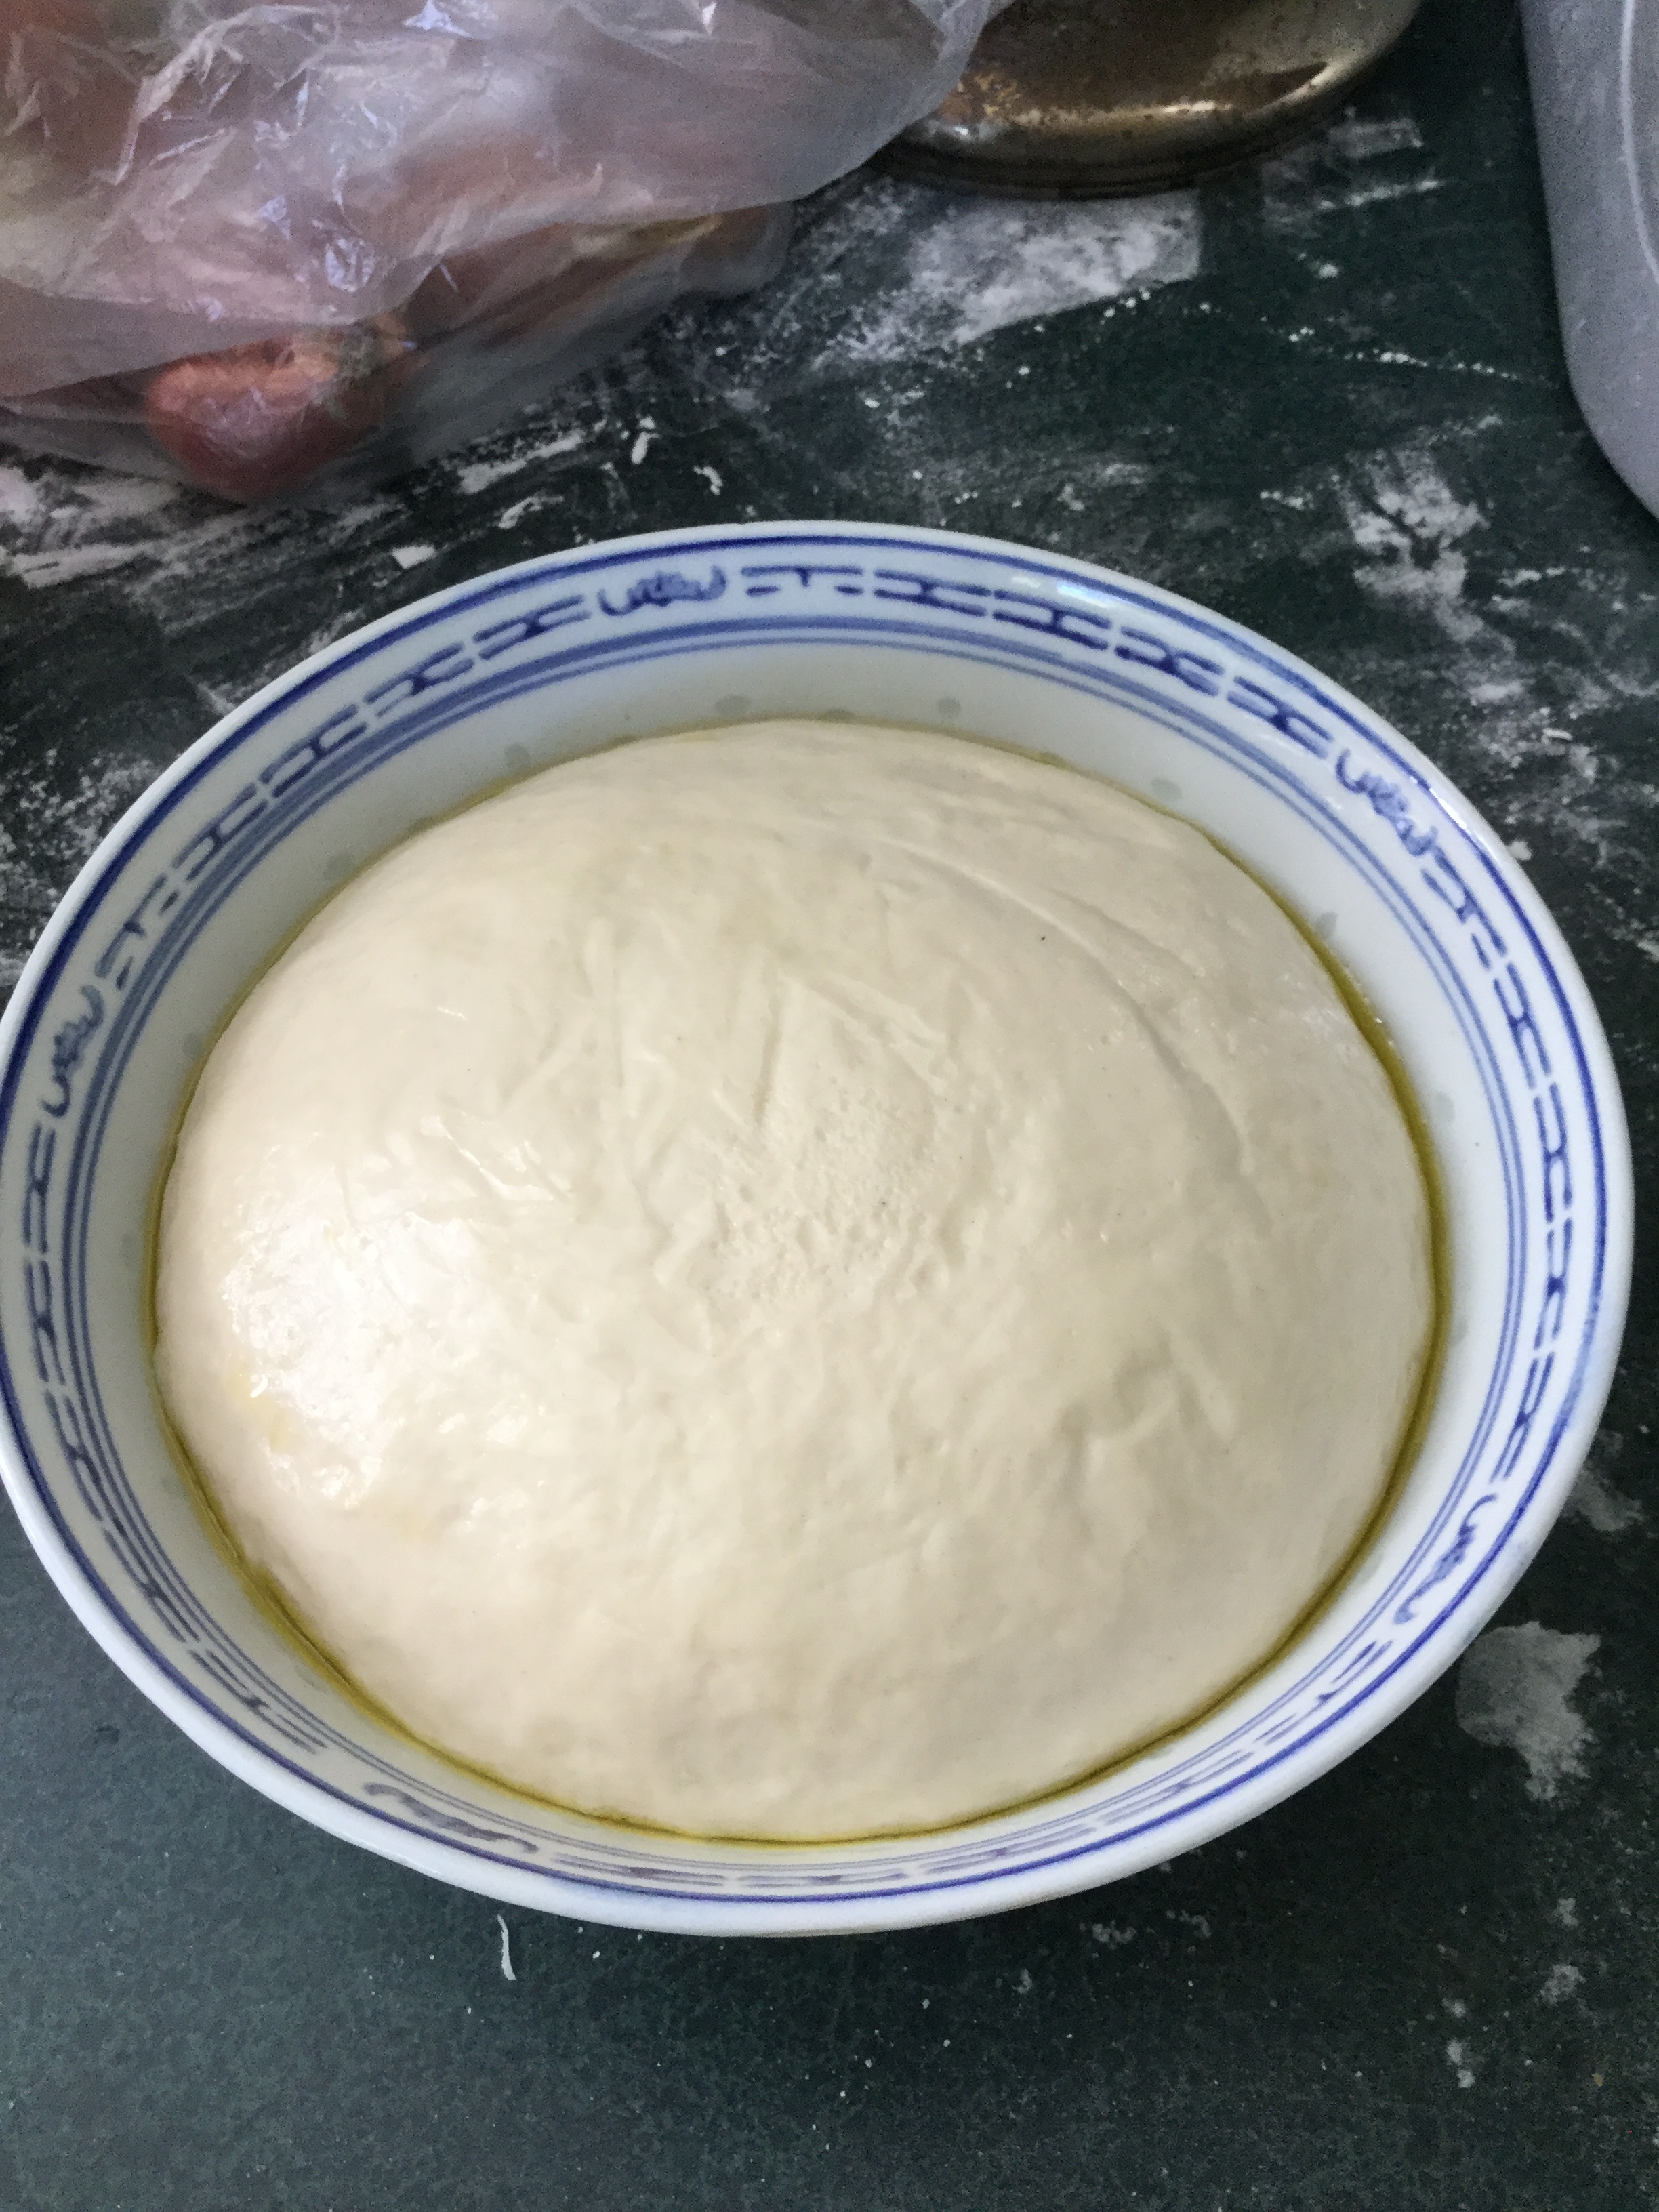
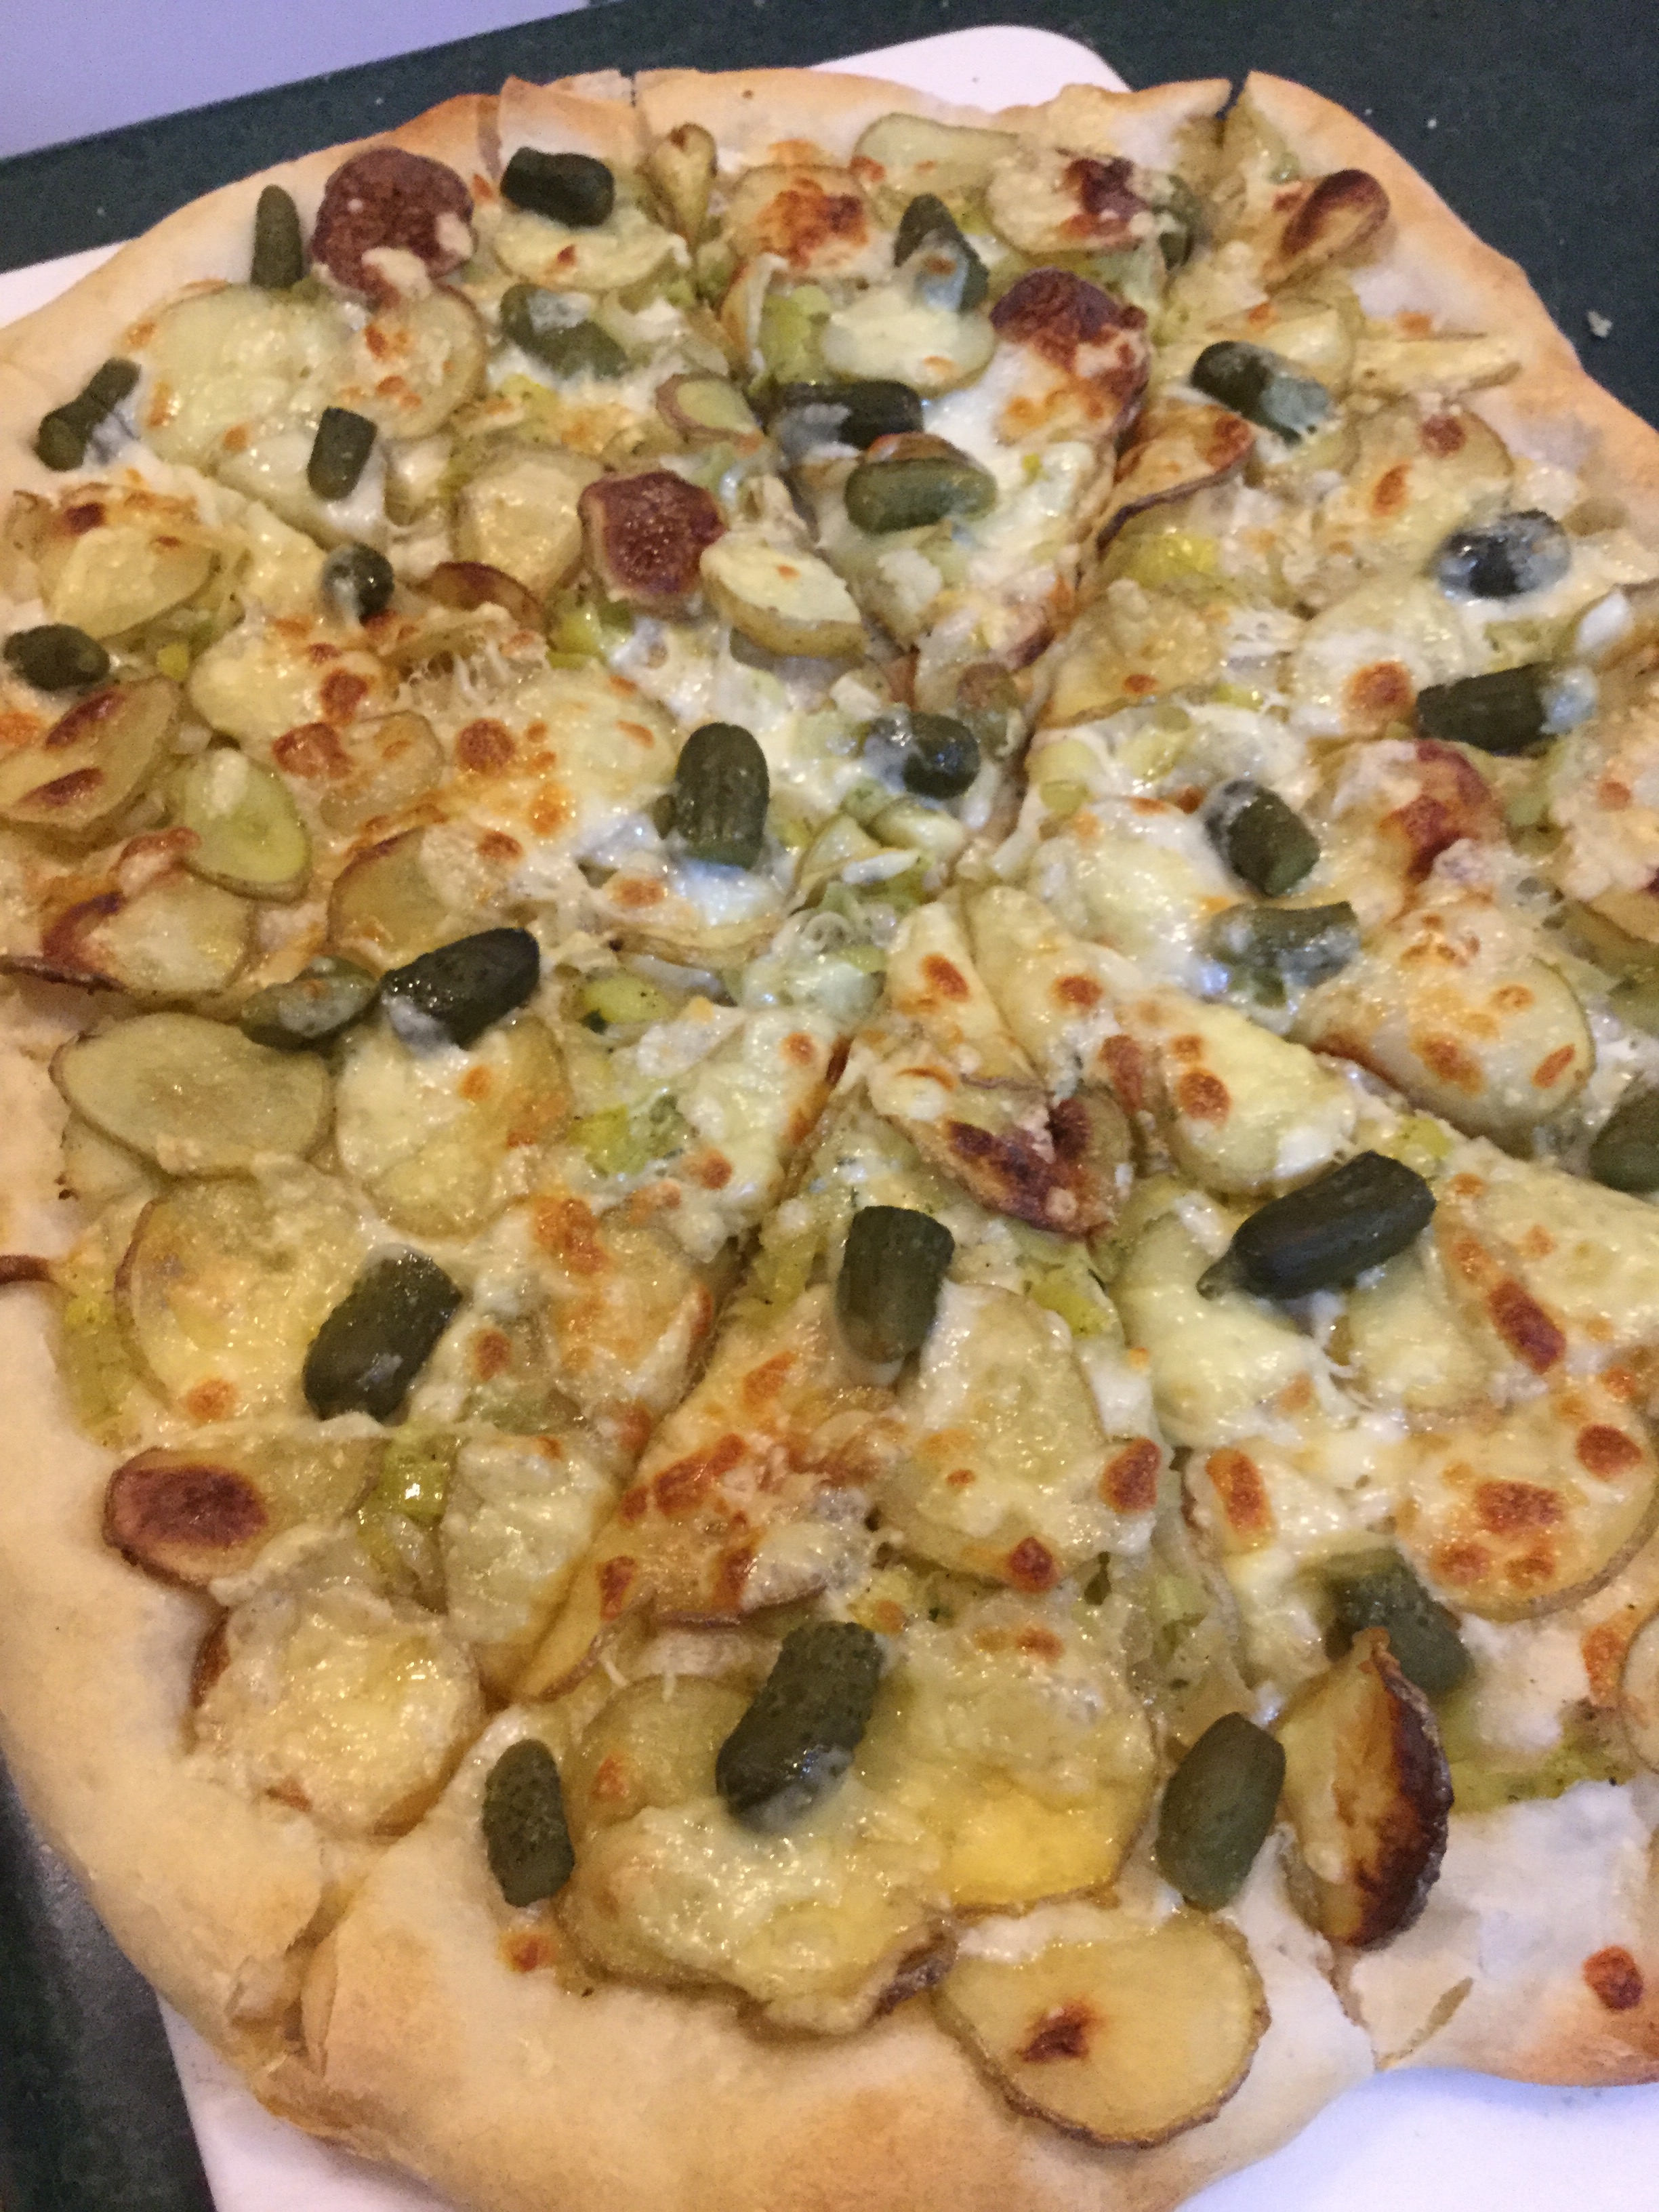
I’ve learned some things about improvising since moving to New Zealand. Cake flour not a thing? Take three tablespoons out of each cup of standard flour and replace with potato starch, then sift the hell out of it. No graham crackers? Use digestive biscuits. Chickens escaping into the primary school next door? Plastic snow fence. Broken accordion? Get a digital piano until you can find an accordion fixer — or a new accordion.

I haven’t found a way to use number 8 wire to fix an accordion.

The career you built over 25 years goes up in flames, along with your mental health and sense of self worth? Take your crazy pills and build a new self. One that you love. One that honours who you are, not who you think you should want to be.

She’ll be right.She'll be right

I came to New Zealand to be a Professor of Defence and Security Studies and a Southern Hemisphere consultant on countering violent extremism and cross-cultural communication. Three years later, I’m a fairly anonymous food blogger and brassica evangelist. I’m also an aspiring accordion virtuoso with a broken accordion accidentally finding my bliss, and myself, on a digital piano.

Some would call that a failure. I call it a rebirth.

Food and music, it turns out, are a pretty good “number 8 wire” for a broken soul.

When I was in High School, I took up the saxophone so I could play in the Stage Band (part big-band, part Dixieland, part jazz, part dance band). 1004065_10151784467223410_1185793730_n-3We played everything from World War II-era swing and Dixieland to Dave Brubeck and Frank Zappa, but I longed to learn to improvise. To take break free of the chart, fly, and make jazz magic all my own.

But I was too shy and, I thought, too female and too caucasian. I didn’t know the rules, and there must be rules. I reckoned I was too lazy and enamoured of my creature comforts to make it as a musician. In the 1970s, when I was teenager, becoming a professional chef certainly wasn’t a thing. Girls who could cook taught Home Economics. And I had this brain . . . and I could write . . . and I grew up around scholars . . . and history was in my blood.

So I followed the recipe. Played the notes that were written. Coloured inside the lines. Did what was expected of me.

White girls can’t jam.

I went to college. I got As. I earned a free ride to Graduate School. I got married. I got divorced. I got a Ph.D. I got a job at a Defense think tank. And I struggled to find ways to transform my longing to create into national security analysis. Sometimes, I almost succeeded. I hated about 50% of the work I did, felt “meh” about 40%, and loved about 10%. And, I reckoned, that was probably better than most people do. I made good money. I had amazing colleagues and friends all over the world. I did some valuable work. I traveled the world. Sometimes, as with my countering violent extremism work, I did work that made me proud and gave me joy. I don’t know if I made the world a better place, but the world made me a better person.

Then my parents got old. And they developed dementia. They weren’t eating. The house was a tip. But they didn’t want to leave.  Again, I tried to follow the recipe, play the notes that were written, colour inside the lines. To be a good daughter. To make their lives better. To make them happy.

But this time, I failed. I hadn’t saved them from the indignity of getting old. Not because I wasn’t good enough, or didn’t try hard enough, or failed to follow the rules. I failed because failure was inevitable. I know this now. My parents were never going to be as they were. Our little family was gone for good.

So, I thought, was my anchor. I spent my life following the script of the good daughter handbook; working to make my parents proud. Not because they expected it, but because I did. But now I wasn’t a daughter. From now on, whether I liked it or not, my life was an improv.

I was terrified. I was setting out on a seven-year panic attack.

Luckily, I found a new anchor. On a train. In Australia. And reader, I married him.1934126_27315433409_5243_n

And I ran away with him. To New Zealand.

Simon held me up when I broke. He pulled me away from the edge. He kept me safe. I know he was terrified, too. But he didn’t show it. Not to me.

He has supported all my various schemes to heal — through therapy, wall paper shredding, cooking, knitting, colouring books, a tattoo and an accordion.

And, oh, so much kale!

He saved my life.

But now, I know, it’s up to me to keep going. And growing. And I’m doing it without a plan or a rule book. I’m well off the map.

I’m tracking my adventure through this blog. And I’m playing my own, improvised sound track. Thanks to my remarkable music teacher, Katie, I’m learning that when it comes to music, and life, I don’t have to learn to walk before I can run.

This white girl can jam!


.

Zhen Kailian Won Ton Soup: A Forty Day Invention Test, Episode Six

Last Wednesday, I woke up with a bit of a throat. Nothing big, just one of those fizzy, back of the throat tickles that could be allergies or could be the beginning of a cold. The kind of sore throat that makes you crave chicken noodle soup, or a vegetarian equivalent. Fortunately, I had some homemade, Saturday morning after the Market vegetable broth in the freezer. IMG_0249
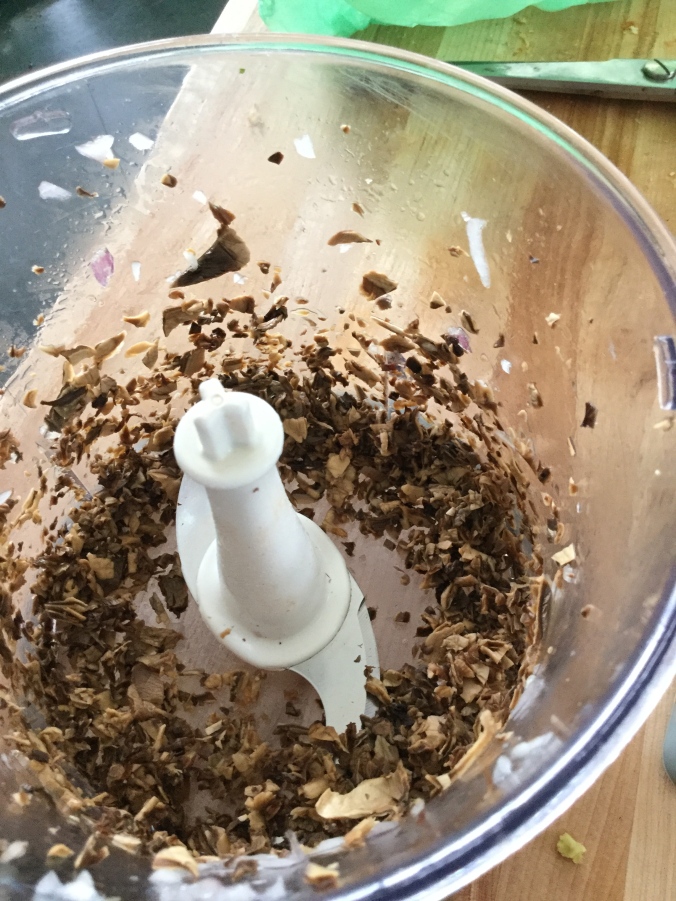
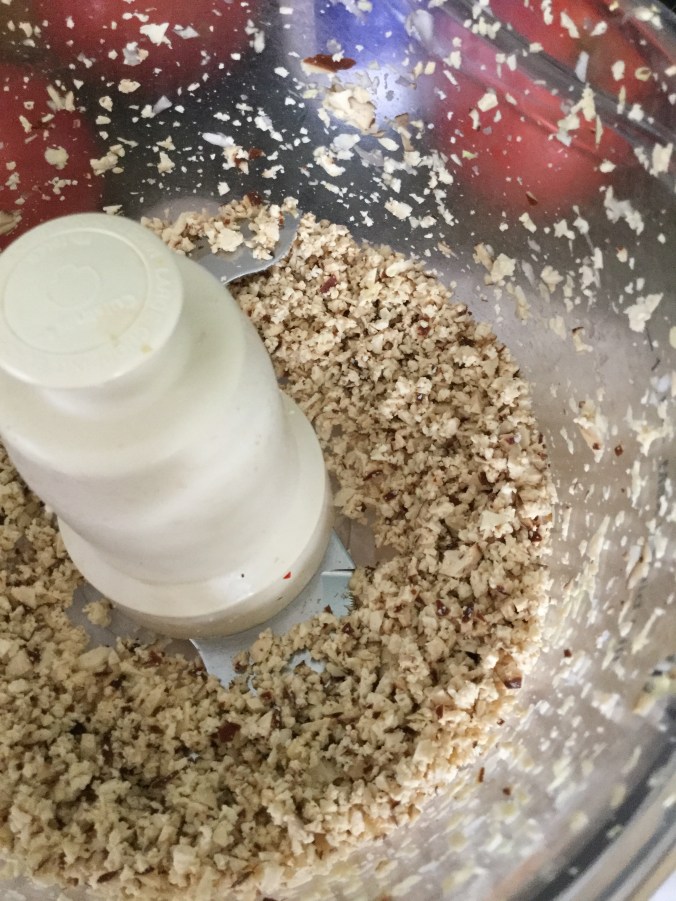
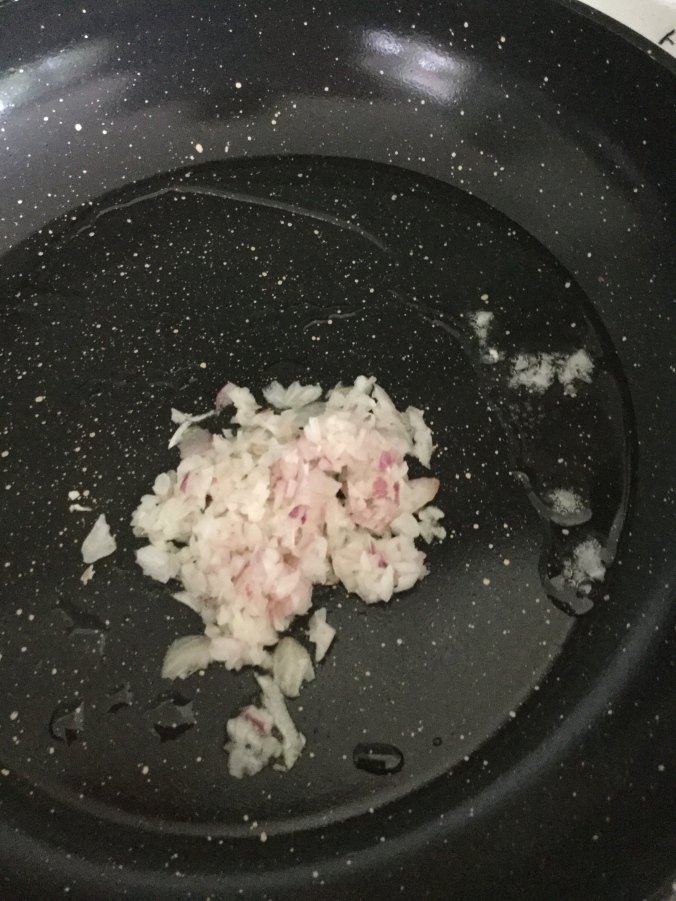
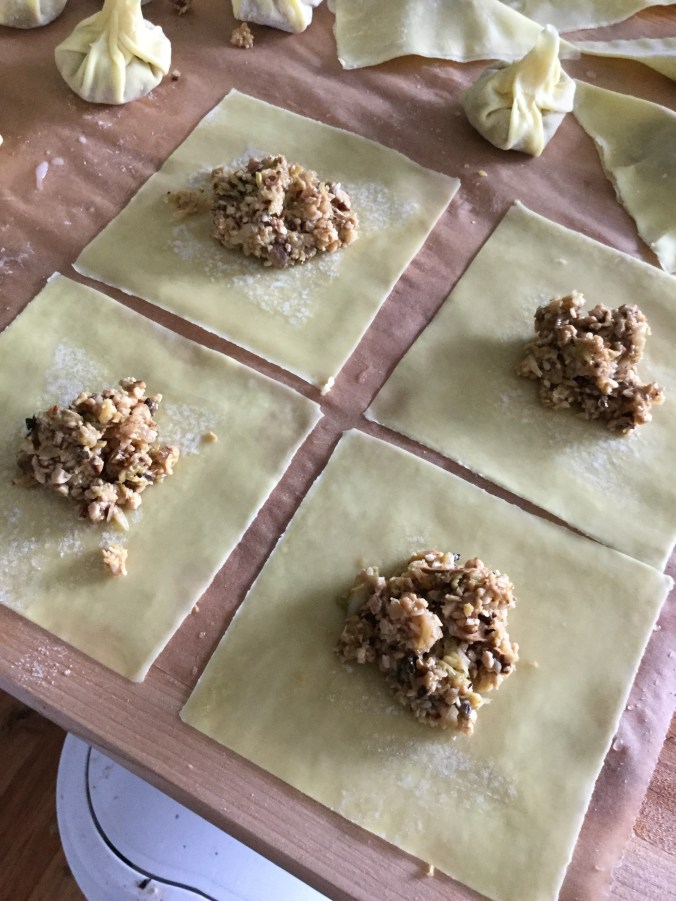
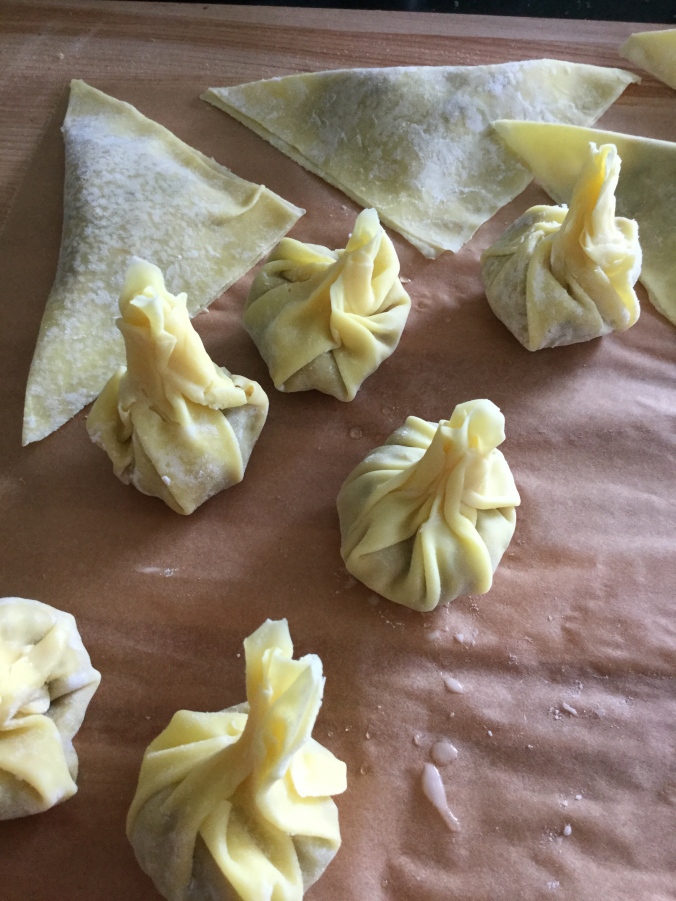
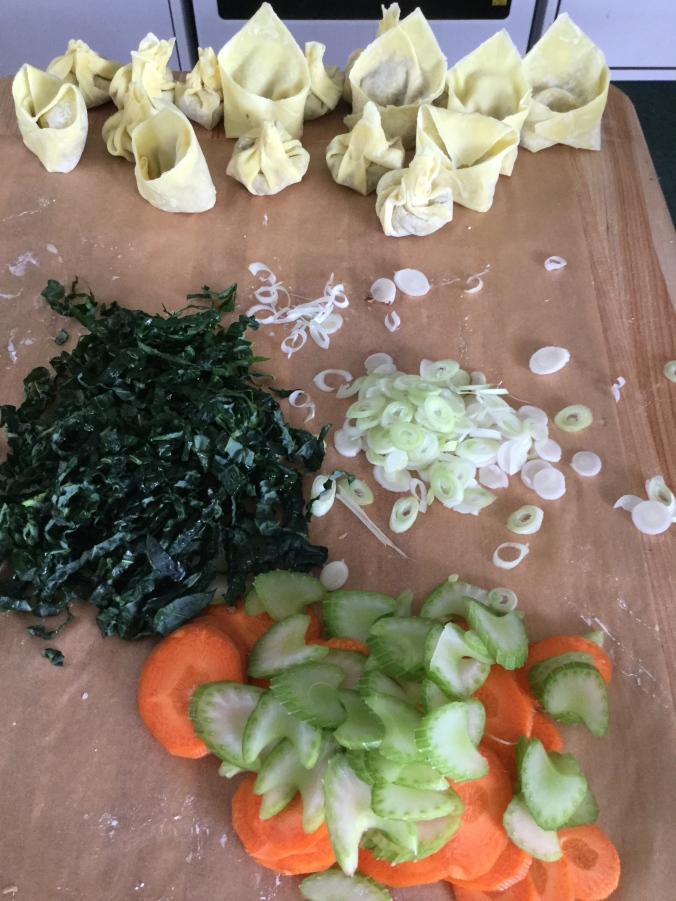
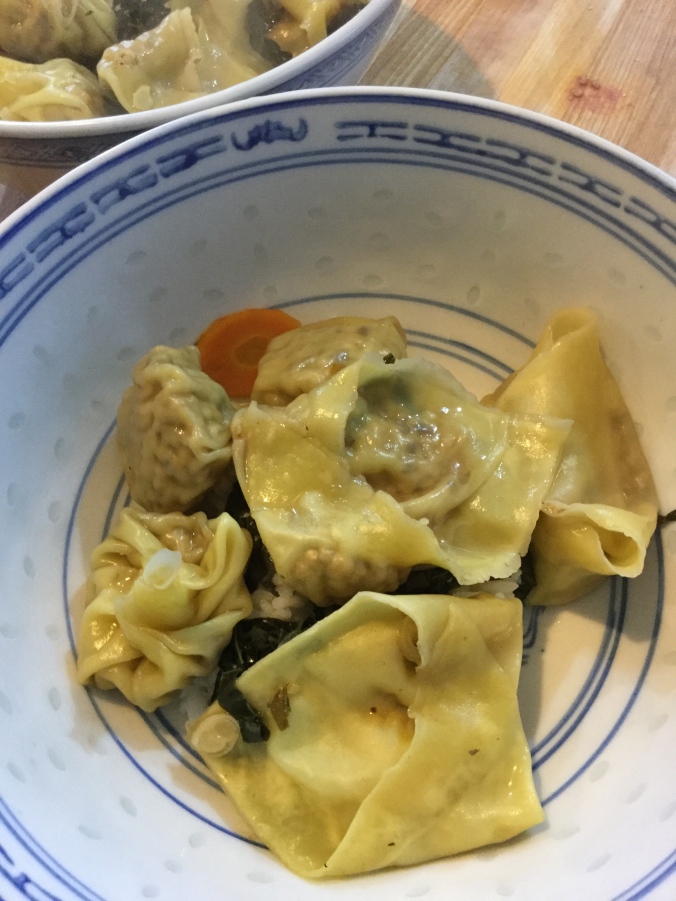
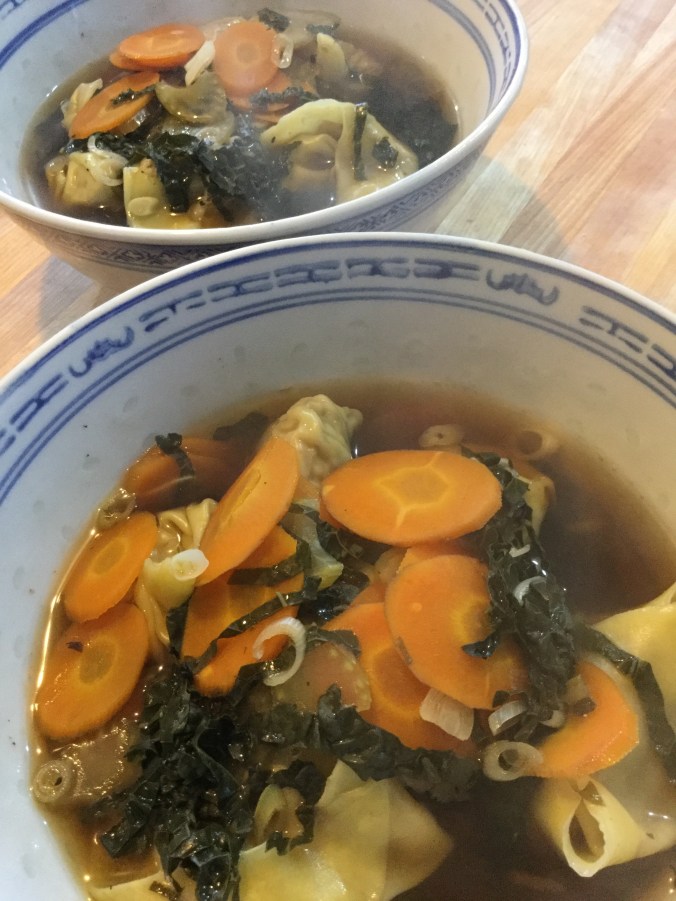
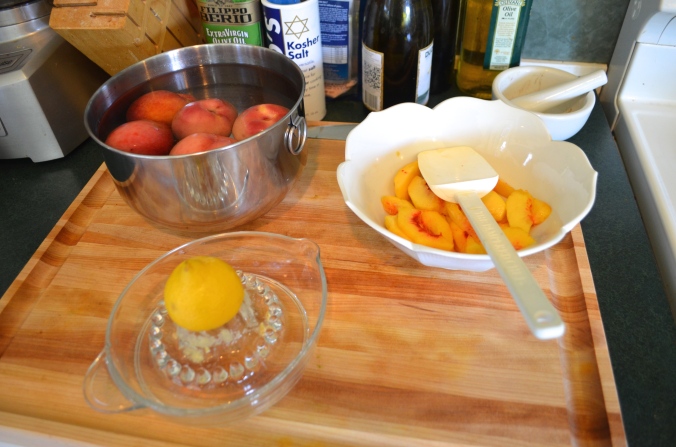
That could stand in for chicken stock, but what about the noodles?  That’s when I hit upon won tons. I’d had dumplings on the brain since I made pot stickers for Chinese New Year. Some yummy won tons in a slightly Asian-ised vegetable broth with a few fresh veggies and lots of tummy-settling ginger would satisfy my desire for throat-and-soul-soothing, brothy soup while constituting a sufficiently hearty meal for my hardworking sweetie.

What, you might ask, qualifies me — an ageing white chick from the Deep South of the US living in New Zealand — to improvise Chinese soup? Well, first of all, I had a poster of Mao Zedong tacked to the ceiling over my bed throughout my teenage years. Why, you ask? Probably for the same reason I wore a dog collar all through High School: to annoy my parents, to get attention without actually DOING anything. My rebellion was pretty wimpy. I also own and have actually read The Military Writings of Mao Tse-Tung and Sun Tzu’s The Art of War, relics of my Ph.D. studies.Mao

Second, I took — and survived — two semesters of Chinese History at the University of Georgia. The professor, Dr. Thomas Ganschow, was recognised as one of the very best teachers at the University of Georgia. He was also renowned for his marathon exams, the undergraduate equivalent of the Mandarin Eight-Legged Essays, for which the questions were sort of : write down all human knowledge. Be specific and include dates. Tom was the main reason I finally realised resistance was futile: I would be an historian. He also launched me on my lifelong quest to understand how other cultures work. My Dad continued to hold out for accounting in the hope that I might, someday, be gainfully employed.

Tom and his lovely Taiwanese bride, Lisa, became good family friends over the years. Lisa was the manager of the Athens Area Community Food Bank, where my mother volunteered as a board member and Thank You Note writer. Really, everyone who donated food or money to the Food Bank got a handwritten Thank You from my Mum. The Thank You Note is a lost art, leaving the world a less gracious place. Lisa is also a fabulous cook. Before my first wedding, some of Mum’s friends threw me a Recipe Shower. Lisa gave me her recipe for Chinese Egg Rolls. I cherished it. I still have it. In fact, I think I will dig it out and work on a vegetarian version. Watch this space!

I have been to China twice, both times for work. Because I was not allowed to take any technology — no smart phone, no laptop — into China, I actually got out and did things instead of staying in my hotel catching up on work, which was too often what I ended up doing on work trips. On my first trip I visited the Great Wall and the Forbidden City and met Helmut Kohl, despite my falling victim to fairly paralysing food poisoning. I was at the Great Wall on the hottest day in human history. It was 114F/45C. Honestly! I was the only person insane enough to be up there in such weather. It was so hot my hair turned bright orange! Between sweat and food poisoning, I lost about 5 kilos on that trip!

On my second trip, I had the unique “pleasure” of being stuck in a parked aircraft on the ground while Beijing had a rare, early November blizzard. The snow plows were still in dry dock. But the snow did, temporarily, sweep away Beijing’s legendary air pollution, so I woke up the next morning to the truly once-in-a-lifetime spectacle of Beijing under clear, sparkling blue skies!

My adopted Elder Sister, Kongdan Oh Hassig, a Korean China expert and linguistic whiz kid, gave me a Chinese name for my 50th birthday. Zhen Kailian means “triumph” and “lotus flower.” CCI22032016I love that. Triumph means so much to me, given my lifelong war of attrition with depression and anxiety. And the lotus flower symbolises, according to buddhist.org, “rising and blooming above the murk to achieve enlightenment.” My next tattoo will be a lotus flower.

Note to Katy: my reputation is in your hands. If Zhen Kailian actually means “Old Lady with Baggy Knickers,” it’s on you!

Katy and I traveled together a lot. She is fearless and up for just about anything. Sadly, we have never been to China together, although we did drink civet poop coffee in Bali.299900_10150433922303410_1665493123_n

Finally, some of the most interesting foods I find at the Riverbank Farmers’ Market are Asian: the beautiful Asian greens, giant daikons, strange and wonderful bitter melons, snake beans, and snow peas. Then there is the Thai herb lady who sells all kinds of Asian flavour makers: Thai basil, lemongrass, galangal, and turmeric root. And the Chinese gentleman with his handmade tofu and fresh Chinese noodles.IMG_1267

And last but not least, the “I Love Dumplings” ladies serve up the most delicious vegan potstickers ever.  My last stop every Saturday morning is at their stall, where I buy a dozen dumplings for $5. Sometimes they are so busy, I have to wait. And I do. Because the dumplings are just that good. Simon and I arm-wrestle for them for the rest of the day. I could get 25 dumplings for $10. Every week I consider this option, only to conclude that there can be too much of a good thing. But I don’t believe that. Some Saturday in the future, I’ll probably give in to temptation. But not this week. Their dumplings provided the inspiration for my won tons.

So, armed with these questionable qualifications, I set out to invent a delicious and healing won ton soup that would be 1) edible, 2) not insulting to Chinese cuisine, and 3) worthy of the name Zhen Kailian. What I came up with was pretty darned tasty, if I may say so myself.

Zhen Kailian Won Ton Soup

Ingredients: For the Won Tons

200g / 7 oz extra firm tofu

1/2 small napa cabbage, finely chopped, (about 1 lb / 450g)

1 TBSP grated fresh ginger

3 shallots, finely chopped

2 cloves garlic, minced or put through a press

1/2 0z / 15 g dried shitake mushrooms, soaked in 1 cup / 700 ml) boiling water

2 TBSP / 3 ml white sesame seeds

2 TBSP / 3ml soy sauce

24 fresh wonton or gyoza wrappers

1 egg white, beaten to soft peak stage (optional)

For the Broth:

6 cups / 1 1/2 liters vegetable broth, preferably homemade, definitely low-salt

2 pieces dried kombu (optional, but nice)

a thumb-sized bulb of fresh ginger

2 cloves garlic, peeled and cut in half

leftover mushroom soaking water

2 glugs (about 1/4c / 60ml) low-sodium soy sauce

1 glug (about a TBSP) toasted sesame oil

For the Soup:

Broth

1 large carrot, thinly sliced on the diagonal

1 stalk celery, also thinly sliced on the diagonal

a handful of greens, I used thin ribbons of kale, but baby bok choy would be nice, too

Steamed Jasmine Rice, optional

thinly sliced scallions for garnish

Let’s Make Soup:

Set the broth on to simmer at very low heat with the kombu, ginger, garlic and mushroom water. Give it at least 30 mins, but an hour plus would be OK, too.

To make the wonton filling:

  1. Toss the finely grated cabbage with some salt (a big pinch) in a colander and let sit for  an hour or so to drain. If you are careful with the salt, you shouldn’t need to rinse the cabbage, but taste it just in case, to ensure that it isn’t too salty.IMG_0372.jpg
  2. Squeeze out as much liquid from the cabbage as you can, then roll it up in a tea towel and squeeze out even more. The cabbage should be really dry. IMG_0376
  3. Drain and finely chop the mushrooms.IMG_0375
  4. Chop the scallions and garlic and grate the ginger.
  5. Either dice the tofu (I used sesame marinated tofu) or chop it in a food processor.IMG_0373
  6. Heat about a tablespoon of neutral oil, preferably peanut oil, in a medium skillet and sauté the shallots until they are getting brown and crispy.IMG_0374
  7. Add the garlic, ginger, and chopped mushrooms and sauté for a couple of minutes.
  8. Then, add the diced/chopped tofu and sauté until it starts to get brown and crispy.
  9. Add the cabbage and sauté until it is wilted and dry.
  10. Take the filling off the heat and add the soy sauce and sesame seeds.
  11. When the filling is cool, fold in the beaten egg white. If you want your won tons to be vegan, you can leave this out. The egg white sort of puffs up when the won tons cook, so they are fluffy, but this is a purely aesthetic thing. If you don’t mind dumpy dumplings, leave out the eggs!IMG_0378
  12. Lay out your dumpling wrappers. Put a generous tablespoon of filling on each one, then brush the edges with water to seal them.IMG_0380
  13. You have a choice of dumpling shapes: if you have square wrappers, you can make flat triangles (just fold them over once and seal), “nurses caps” (pull the two tips of the triangle on the folded edge together and seal, or “purses” (dampen all four sides, bring them together and twist to seal). If you have round wrappers and you are a showoff, you can make pleated dumplings. I didn’t have round wrappers, so I couldn’t make those. Which shape you chose is just a matter of personal preference. Simon and I were divided. He preferred the purses. I thought the bunchy part was a bit too stodgy. I preferred the nurses caps. The flat triangles turned out to be a bit tricky to eat.IMG_0379

Now, put it all together!

  1. Bring your yummy broth to a simmer and add the sliced carrots, celery, greens. Let them simmer for a couple of minutes, add the soy sauce and sesame oil, then
  2. Add your won tons — yes, you are going to cook them right in the broth. Let them simmer for 2-3 minutes.IMG_0381
  3. If this is dinner, you can bulk things up a bit by putting a scoop of jasmine rice in the bowl. This also adds a little textural interest. IMG_0382
  4. Lay the cooked wontons on the rice, then ladle over the broth and vegetables.IMG_0383
  5. You can garnish the whole thing with some thinly-sliced scallions and/or bean sprouts.IMG_0384


Carries’ French Apple Pie: A Forty Day Invention Test, Episode Five

More years ago than I care to mention, I was named for my two grandmothers: Frieda Matthaie Ziemke and Caroline Ketz Saltenberger. Frieda died too young and many many years before I was born. I never knew her. I have a few photos of her. She was very beautiful, and very young. Sadly, I will never be able to share any of her recipes. We have none. No written memories of her at all. At least none that I have seen. All I have of her are a few photos and her name, which I cherish. She always looks a little sad.

Caroline lived into her 80s, but she was damaged by a series of strokes, also too young, a few years before I was born. I knew her, but the Carrie Saltenberger I knew was frail, largely confined to her armchair (and later a wheelchair). She was felled by the hypertension that runs in my family and that was, sadly, untreated in her case. She was feisty, though, and had a wicked sense of humour. Woe be on any little kid that thought they could pull something over on Grandma because she couldn’t move very fast. She was a demon with her fly swatter.

For the first fifty years of her life, Grandma Saltenberger was a hard working farm girl.

1016232_10151775540513410_1132993743_n

Carrie Saltenberger with her three eldest children, Idamae, Billy, and baby Anita, c. 1936

Along with my Grandfather and his maiden sister, Ida — known to us as Tanta — Grandma worked their little farm in far Northern Wisconsin, raising dairy cows, chickens, occasional turkeys (which she hated), growing vegetables, and sustaining the family through the Depression and the War years on very little in the way of cash.

As the years went by, Grandma became less and less rooted in the present, but her command of the past was astonishing. I remember her teaching me to make biscuits by reciting the recipe, step by step, as I measured, sifted, blended, cut and baked. Much of what I know about the Saltenberger family’s (occasionally colourful) history came from Grandma. Usually on the sly, while my Grandpa was napping. Like many other families, the Saltenbergers have two histories, the official one and the “interesting” one. Grandpa was the keeper of the official history. You went to Grandma for the interesting bits.

1001357_10151784586273410_1295560947_n

Portrait of Carrie Saltenberger in 1975

She was always called Carrie. In our family, I have always been called Carrie. In my mind, I have always been Carrie. I am proud to be Carrie, because I am proud of my Grandma and what she achieved and endured. So, no, “Carries’ French Apple Pie” is not a typo. Instead, it is my take on her long cherished recipe. Two Carries. One pie.

Strictly speaking, this is not a pie at all, but a cobbler or, perhaps, a crumble. I found the recipe tucked among the correspondence between my Mum and her aunt, our Tanta. Tanta would have written the recipe after Grandma’s illness made it difficult for her to write. But Tanta made the provenance of the recipe clear, this was Carrie Saltenberger’s recipe, her favourite recipe. “Many years old.” Part of my family’s past.CCI21032016

As is often the case with Tanta’s recipes, the directions are a bit notional. I’m not sure what makes it French. Perhaps they called it “French” to distinguish it from Dutch Apple Pie, with custard, and German Apfel torte. “Put in a baking pan.” What kind? Glass? Metal? What size? Does the baking pan go in the oven while I’m making the crust? How long? These were all questions I set about to answer, through trial and error.

I did make a few changes to “modernise” the recipe a little, but nothing that changed the fundamental simplicity and homeyness of Carrie’s original. I’m not a huge fan of nutmeg, at least not in large quantities. So, I stepped up the cinnamon, cut the nutmeg, and added another dimension with allspice and black pepper. I love black pepper with fruit. It makes it taste fruitier, somehow. It is a must on flabby tasting supermarket strawberries. The Italians use black pepper on fruit a lot, so perhaps I transformed Grandma’s French Pie to an Italian one.

Grandma would have used apples from their apple tree (which was still going when I visited as a child). The apples would have been harder and more tart and probably would not have produced as much liquid as my New Zealand-grown Farmers’ Market apples would. So, I also added cornflour to the fruit as a thickener (which is entirely optional), and dotted the fruit with 2 TBS / 1 oz / 25g of well chilled unsalted butter, cut in smallish chunks, also to thicken it a bit. I also cut back on the sugar and added a bit of salt to the crust.

As it turns out, the experiment was a thundering success. The result was everything I’d hoped: homey, delicious, and as Tanta wrote, “very good easy to make, too.” Not too sweet, either. The crust tastes pleasantly eggy, something between a cake and a meringue. When warm, the spicy apples cry out for a scoop of vanilla ice cream, but all I had was cream, which was also pretty darn yum.  No wonder Tanta encouraged Mum to try it, adding it was “my favourite recipe and also your Ma’s.” Ladies, you had good taste!

Carries’ French Apple Pie

Ingredients:

For the Fruit:

2 1/2 lbs / 1 kilo mixed apples (I used Braeburn and Galas),

1 tsp cinnamon

1/2 tsp nutmeg

1/2 tsp ground allspice

1/4 tsp finely ground black pepper

1/2 cup / 100g sugar (I think raw sugar would be nice here, but I used granulated)

1 TBSP cornflour (cornstarch)

1/2 cup water (120ml)

Juice of 1 lemon

For the Crust:

3/4 cup / 105 g all-purpose flour

1/2 cup / 100g sugar

1/2 tsp salt

1 egg, lightly beaten

Instructions:

Preheat the oven to 375F / 190C

Butter a glass 9×12 or similar sized baking pan. I used an oblong gratin dish.

Peel, core, and slice the apples.

Stir together the sugar, cinnamon, allspice, black pepper, and cornstarch in a small bowl, then combine it with the sliced apples.

Arrange the apple slices in the baking dish, sprinkle the water and lemon juice over them, and put them in the preheated oven for 20 minutes.

IMG_0393

See, Auntie J: I tried to arrange the slices in sort of rows! But my soul resists order.

While the apples are baking, sift together the flour, sugar, baking power, and salt. Lightly beat the egg in a separate bowl.

IMG_0395

Combine the beaten eggs with the dry ingredients and crumble together like pie crust, just like Tanta says. It will feel softer and crumblier than a short crust dough, but not as dry as a crumble topping.

Take the apples out of the oven, dot with the butter, and spread the dough over the apples.


Return to apples to the oven and bake for another 45 minutes, or until the crust is golden brown.

IMG_0400

Serve warm or room temperature with cream, custard, ice cream — whatever you fancy!

IMG_0401

Northeast Georgia Barbecue, Sort of: A Forty Day Invention Test, Episode Four

We are having our first rainy day in. . . oh. . . ever so long, so it is a good time to catch up on my adventure in improvisational cooking.

Of the foods I miss most since adopting the vegetarian lifestyle — bacon, sausage, and really juicy, rare burger — pulled pork barbecue is right at the top of the heap. Actually, I started missing proper pulled pork pretty much as soon as I left North Georgia. True, pulled pork has become a foodie “thing” in recent years, but, to my mind, nothing matches the pulled pork I grew up on in Northeast Georgia. I learned to tolerate other regional versions, but none of them lived up to my tangy, vinegary memories.

Pulled pork reaches its Platonic Ideal at Zeb Dean Barbecue in Danielsville, Georgia. Before I was a vegetarian — and, OK, once or twice since, mea culpa — whenever I went home for a visit, a pilgrimage to Zeb’s was a must. I’ve written before about Zeb’s, in the context of Sweet Tea. In the context of pulled pork, Zeb’s is nirvana. The. Best. Pulled Pork. In. The. Universe.

The key to Zeb’s deliciousness is the sauce. As you can see in the photo above, Zeb’s sauce is fairly thin, with lots of vinegar, pepper, and paprika and little or no tomato. Now, for Southerners, barbecue is a very personal thing. If you travel around the Southern United States eating barbecue, you’ll realise that the preferred meat (pork, goat, beef, or chicken) and the sauce ingredients vary widely from one county to the next. In low country North Carolina, they like mustard-based sauce. In Kansas City, Missouri, where they also pride themselves on barbecue, the sauce is sweet-and-sour, brown sugar and tomato-based. I hear they make barbecue in Texas. Out of cow. I’d say I’m skeptical, but then, I am about to tell you how to make barbecue out of tofu. Glass houses, and all that.

At Red, Hot, and Blue — which was co-founded by Bush 41 hit man, Lee Atwater — the original Memphis sauce was heavy on Worcester Sauce and ketchup. Red Hot BlueNow they are a national franchise and they have wandered from their Memphis roots. RH&B now offers five different sauces, <gasp> Barbecue Brisket, and <double gasp> pulled chicken. The original, homey, hole-in-the-wall location in Arlington has, sadly, closed.

Fairlington United Methodist Church, in Arlington, Virginia, had a chicken barbecue every spring and served absolutely melt-in-your mouth half chickens, cooked over hardwood and mopped with a tangy, sweet-and-sour barbecue sauce. My mouth waters just thinking about it. I haven’t been for years. I hope they still do it.

FUMM chicken

The Annual Chicken Barbecue and Fun Fair at Fairlington United Methodist Church

The sauce I grew up with was a little bit greasy, a little bit hot, very vinery, and very black peppery (which is different from hot). My original exposure to this North Georgia sauce was at PTA fund-raising barbecue dinners that my elementary school had at the beginning of each school year. You’d get one of those plastic, divided plastic school lunch plates with pulled pork, stew (scraps and burnt end of pulled pork that were chopped and stewed with sweet corn, onion and other stuff), coleslaw, and a slice or two of squishy white bread. The sauce looked like a vinaigrette with lots of pepper and paprika.

Charlie Williams’ Pinecrest Lodge was most famous for its all-you-can-eat catfish fry — complete with deep fried dill pickle chips and fried okra — but their barbecue was great, too. Vinegary. Peppery. Smoky. Yumminess. Tragically, Charlie William’s is now gone, too. Sometimes progress sucks.

Charlie Williams

Charlie William’s Pinecrest Lodge on Whitehall Road

Pulled pork, barbecued chicken, and catfish fries are all in my past now. But was it possible that I could develop a formula for a barbecue sauce that might at least pay homage to those childhood memories? I’ve tried various versions over the years. But my Forty-Day Invention Test provided the motivation, finally, to knock the barbecue sauce challenge on the head.

There are some obvious challenges to creating a vegetarian version of something as decidedly carnivorous as pulled pork. If it strikes you as odd that a vegetarian food blogger spends so much time reminiscing about meat, just remember, I’m not doing this because I hate meat. I’m doing it because I love my husband, animals, and the planet, pretty much in that order.

For a sauce that will go on vegetables and/or tofu, the flavour needs to be a little subtler and a good bit more complex. There is also the problem of smoke. I smoked my tofu (I’ve been making smoked tofu “bacon” for several years), but because tofu is essentially fat-free, the smoke taste can be a bit harsh. You have to take care not to overdo it. Smoking the tofu also cooks it, which comes at some price concerning texture. I want to get my hands on a cold smoker, which would eliminate that problem and could enable me to smoke things like cheese. In the meantime, getting some smoke in the sauce gives you options. I added a bit of smokey flavour to the sauce by using smoked paprika instead of the regular paprika that you would typically find in a North Georgia sauce. Smoked paprika is sort of wood-neutral, that is, it isn’t obviously hickory, apple, or mesquite smoked. You could also use Liquid Smoke, which comes in hickory flavour. The only smoke essence I can get here is manuka smoke-flavored, which is lovely, but isn’t North Georgia. I wouldn’t use mesquite smoke, either, but you can do what you want. I’ll never know!

Mouth feel, at least in the tofu version, was a bigger challenge than flavour. Let’s be honest. The thing that makes pulled pork barbecue taste awesome is the fat. Perfectly slow-cooked pork is oleaginous, almost creamy, with crunchy bits of skin and burnt bits of meat. So, all the sauce needs to do is complement the flavour of the meat and balance out the fat. That’s what the vinegar does — it emulsifies with the fat to transform grease into deliciousness.

There is no grease in tofu, so my sauce was going to need more added fat than I might want to put in a sauce for meat. I used butter, but margarine would work just as well, here. Maybe even better.

In general, I disapprove of ketchup in barbecue sauce. In this case, though, it was necessary in order to hold the sauce together and make it, well, saucy. It gave the sauce the substance it needed to coat the tofu bits.

Another challenge for vegetarian barbecue is Worcester Sauce. The best-ever-and-really-only-acceptable Worcester Sauce, Lea and Perrins, contains anchovy and is not, hence, vegetarian. Some of us choose to look the other way, or pretend we didn’t read the ingredients. My ultra-principled partner will have none of that. Here, however, New Zealand came to the rescue with HP (Brown) Sauce, which is a bit like A1 Sauce, but, again, without the anchovy. It also adds a bit of saucy texture. If you can’t find HP Sauce, Pick-a-Peppa (my go-to vegetarian Worcester replacement) would work just as well, but I haven’t found Pick-a-Peppa here in New Zealand. I’ve tried a couple of vegetarian Worcester sauces, but they lack a certain zing.

Kechup is much sweeter here in New Zealand than I’m used to, so I didn’t add any sugar. You can add some, to taste, depending on the sweetness of your ketchup. You know what you like.

I’m pretty sure Zeb’s doesn’t put lemon juice in their sauce, but I like it here.

I’m happy with what I’ve come up with, even though Zeb wouldn’t recognise it. I hope you are, too!

Northeast Georgia Barbecue Sauce, Sort Of

1 cup (250ml) ketchup

1/2 cup (60ml) cider vinegar

1/2 cup water (60ml)

1/4 HP Sauce (60ml)

2 ounces (50g / 4TBS) unsalted butter or margarine

1 TBS smoked paprika

1 tsp garlic powder

Lots of finely ground black pepper (something between 1 tsp and 1 TBSP)

1 tsp Sriracha Sauce (or 1/4-1/2 tsp Tabasco)

1 bay leaf

juice of 1 lemon

Combine all the ingredients in a medium saucepan and bring to a boil.

The sauce is best if you let it rest for a day or two so the flavours can marry-up.

Pulled Tofu

There is a Chinese gentleman at the Riverbank Market who sells lovely, very compressed tofu. It is the consistency of cheddar cheese and doesn’t need draining. If you use the extra-firm, water-packed tofu commonly available in supermarkets, you’ll want to drain it very well.

1 lb (450g) extra firm tofu

kosher salt

1/2 recipe of Northeast Georgia Barbecue Sauce, Sort of — more to taste

Optional: your favourite spice rub.

Drain the tofu by putting on a plate and weighing it down with a couple of heavy cans or a bag of flour.

Next, you need to “cure” the tofu. Rub it well with kosher or sea salt,  a 50/50 mix of salt and finely ground black pepper, or salt and your favourite spice rub. Penzy's OzarkI used Penzy’s Ozark Blend, which is very black peppery. Think Col. Sanders secret herbs and spices. If you don’t live in the United States and can’t get Penzy’s excellent spice blends, use whatever spices you like. And next time you are in the US, find a Penzy’s store and stock up! You can mail order, too.

Wrap the tofu with its salt and spice coat in cling film and put it in the fridge overnight.

Next, you have two options.

Option 1: take the tofu out of the fridge wipe off the excess salt, and grate it on the coarse side of a box grater. This gives it that “pulled” look. Sauté it briefly in a neutral oil, like peanut or canola, then add the sauce and let it simmer for a few minutes so the sauce can soak into the tofu.

Option 2: smoke and chop the tofu: I smoked my tofu over hickory wood for about 20 minutes in my handy-dandy Cameron’s stove top smoker. My extra-firm tofu developed a bit of a crust in the smoker, so instead of grating it, I chopped it very fine. The smoker added a nice, smokey verisimilitude, but aesthetically, I would have liked to have had some grated tofu, too. Next time, I think I will go half and half.

Serve the pulled tofu on a toasted bun topped with cole slaw. I used my favourite North Carolina Pickle Slaw, recipe below.

North Carolina Pickle Slaw

I don’t know what makes this North Carolina, except I based it on a recipe from Nava Atlas’ American Harvest: Regional Recipes for the Vegetarian Kitchen (Ballentine, 1987) that she called North Carolina Slaw. Sadly, American Harvest is out of print. I think of this as my one-third slaw, since all the dressing ingredients are 1/3 cup. I guess the metric version would be 75ml Slaw.

I don’t think the celery seed is authentic. But I like celery seed in my slaw. Potato salad, too.

For the Dressing:

1/3 cup (75ml) mayonnaise

1/3 cup (75ml) American-style yellow mustard (don’t use your fancy Dijon for this)

1/3 cup (75ml) vinegar, I used malt, but cider would be more authentic

1/3 cup (66g) sugar

1 tsp celery seed

Whisk all this stuff together to form a smooth dressing

For the Slaw:

1/2 small green cabbage (about 1 lb / 450g), shredded

1/2 small red cabbage, shredded

3 or 4 scallions, chopped fine

1/4 c / 60ml chopped pickles or cornichon

1 large or 2 smallish carrots, grated

a handful of parsley, finely chopped

First, sprinkle the shredded cabbage with a bit of salt and let it drain in a colander for about an hour. Unless you’ve gone overboard with the salt, no need to rinse it. (That’s why I don’t add salt to the dressing)

Second, run the cabbage through a salad spinner to drain out as much water as possible. If you don’t have a salad spinner, wrap the cabbage in a kitchen towel as squeeze it as dry as you can. (These steps ensure that your cabbage will not weep and make the dressing all watery. Don’t worry, the cabbage will stay nice and crisp.)

Third, combine the dressing and the slaw ingredients in a big bowl and mix it well. Let it stand for at least an hour before eating.

Your delicious pulled tofu sandwiches will look something like this. Although, with luck, you won’t burn your sandwich buns!

IMG_0352


Not-Quite-Tanta’s Peach Kuchen: A Forty Day Invention Test, Episode Two


“A Georgia peach, a real Georgia peach, a backyard great-grandmother’s orchard peach, is as thickly furred as a sweater, and so fluent and sweet that once you bite through the flannel, it brings tears to your eyes.”

Melissa Fay Greene, ‘Praying for Sheetrock’

I grew up in the Peach State.  I’ve lived many places, but in my heart, I will always be a “funny talkin’ honky-tonkin’ Georgia Peach.” Georgia is no longer the United States’ top peach producer, but it still has the best peaches. My High School sweetheart was somehow related to the owners of the local orchard, Thomas’ in the thriving metropolis of Bishop, Georgia. He could get us in early, before they opened to the general public and — more importantly in Georgia in July — before the temperature and humidity rose into the mid-80s.  Still, peach picking was hot, humid work. After an hour or two Thomas’, I’d be sweaty, thirsty, sticky and covered with peach fuzz and the occasional bee sting. But nothing can match the joy of standing on a step ladder in the middle of a peach orchard and biting into a warm, perfectly tree-ripened peach.

Peaches are my absolute, all-time favourite fruit. I came by my love of peaches early. Long before we moved to Georgia. You see, my Great Aunt, Tanta Ida, made the absolutely most delicious peach coffee cake ever.

1012823_10151775618753410_1531298038_n

Tanta Ida (2nd from the left) with Dad, Mum, Grandma, Janice, Grandpa, and the budgie (circa 1955)

My Aunties tell me she would make huge pans of küchen for all the various boyfriends who visited the foxy Saltenberger girls over the years. She made some for my Dad when we visited Eagle River every summer, and I happily embraced the peachy deliciousness windfall. [The family lore says Dad hated Eagle River — he didn’t — because he was bored without any libraries to hand. I think it was more a matter of vanity: people were constantly feeding him and, as you can see in this vintage photo, he got a bit chubby. And then there were Grandpa’s Scotch and Root Beers.]

All my life, I’ve tried to find that special peach deliciousness. A few weeks ago, while I was going through some of Mum’s old recipes, I found a very old, stained recipe for Tanta’s Peach Küchen. Joy! My next invention test was born.

New Zealand produces peaches. They are tasty, but they are delicate wee things. In the effort to minimise the fuzz, the varieties of peaches they grow here have very thin skins. It’s almost impossible to get them home from the market unscathed. Fortunately, the nectarines are fairly robust. Peaches have fuzz to protect the fruit from water and keep it from rotting. It’s like a little peach raincoat. Nectarines are just peaches without their raincoats. As far as this recipe is concerned, they are interchangeable.

I was, however, determined to work with the real thing. Tanta didn’t use nectarines, so I wouldn’t either. As it turns out, getting the peaches home safely was only the first of my challenges. When I started this Lenten journey of recipe invention, I said I would share the successes as well as the less-then-successes. In this case, there were a couple of false starts before I finally settled on formula that works.

The challenge, in this case, was translating a shorthand recipe from another era on another continent into something that I could recreate in my kitchen in New Zealand. The directions were fairly general, but, obviously, 3 cakes of yeast and 7 1/2 cups (1,065g) of flour was going to make one honking big cake.  But how big? “Spread in pan (greased well)” wasn’t much help. And what is the modern, dry yeast equivalent of 3 cakes of yeast?DSC_0787

For some help, I turned to my trusty copy of The Food Substitutions Bible (see “The Third Cookbook of Christmas”). It suggested that one cake of fresh yeast is equivalent to one package, or 2 1/4 tsp (8g) of active dry yeast. Great. That means I would need over 2 Tablespoons (24g) of yeast for 7 1/2 cups of flour! Argh! An oven explosion was sure to ensue.

I decided I would cut the recipe by a third(ish), since there was only me and Simon to eat it, so I trusted my baking experience and estimated how much yeast I would need. So, for 4 cups (568g) of flour, I would use the equivalent of one package of dry yeast, 2 1/4 tsp (8g). And 3 tsp of salt seemed like an awful lot, so I cut that back to 1 tsp.

The next hurdle was the liquid. Tanta, at least before my Grandfather burned the farm down (long story for another post), would have used whole, raw milk and eggs straight from the chicken. My concern was that our supermarket milk, even whole milk, might lack the right balance of fat and natural sugar. We don’t buy whole milk, but I keep a bag of New Zealand’s #1 export commodity, whole milk powder, on hand for baking. That’s what I ended up using.

I reckon the butter we get here in New Zealand is probably closer to what Tanta would have had than the processed butter we used to get in the States. The fresh (unsalted) butter here is incredibly dense, with very little added water. So no worries there.

Her farm eggs were probably as unpredictable as our farm eggs, so I held back one of the yolks, just in case everything ended up too gooey. It didn’t and I ended up using the whole egg.

The biggest question mark turned out to be the fruit-to-cake ratio. The recipe just says “arrange the peach slices on the dough.” How many peach slices? How many peaches?

In the end, I decided, the first time around, to base the number of peaches on the size of the cake. I guessed that Tanta would have made her küchen in a lasagne-sized pan (9×13 inches). I had inherited a marvellous lasagne-sized pan from the farm that Mum told me was Grandma’s coffee cake pan. Coffee Cake? Küchen? Same pan? I decided to use my 8×8 inch glass cake pan. Based on the reduced amount of dough I had, it seemed a reasonable assumption.

Tanta’s recipe called for 3 cups of sugar and 4 1/2 tsp of cinnamon for the topping. Yikes! Another hint that she was making big, sheet cakes. I cut that back to 1/2 cup (100g) sugar and 1 tsp of cinnamon — you can always add more if you like your streusel really cinnamony.

So, my first effort was OK, but not right. Why? It came down to two miscalculations: too much yeast, not enough pan. So my first küchen rose too much and threw most of the fruit and topping out of the pan and on to the pizza stone that lives at the bottom of my oven. Smelly burning sugar mess.

The good news is that two weeks later I tried again, adjusting the yeast, using a larger pan, and, just to put my own spin on things, adding oatmeal and brown sugar to Tanta’s sugar-butter-flour-cinnamon topping. Here, ladies and gentlemen, is the final result.

Not-Quite-Tanta’s Peach Küchen

DSC_0778


This is not an extravagantly sweet coffee cake. It is an old-fashioned, gather around the kitchen table for elevenses coffee cake. You can eat this for breakfast and not feel guilty. After all, it’s basically peaches and oatmeal. Right? My theory is that my Tanta and Grandmother developed their recipes during the Great Depression, when money was scarce, especially on farms, and the sweetness in food came, as much as possible, from the natural sugars in the milk and fruit.

Ingredients:

1 cup (250ml) whole milk (reconstituted dry works well)

1/3 cup (65g) granulated sugar

6 TBSP (85g) unsalted butter

1 1/2 tsp (7ml) active dry yeast (NOT quick rise or bread machine yeast)

2 large eggs

4 cups (568g) all-purpose / standard grade flour

1 tsp (5ml) kosher or sea salt

Topping:

7 peaches (or more, if you like)

Juice of 1 lemon

3 TBSP brown sugar

1/2 cup (100g)2 granulated sugar

1/3 cup (70g) standard grade flour

1/3 cup rolled oats

2 TBSP butter, melted

1 tsp cinnamon

Preheat the oven to 375F/190C. Butter a 9 x 13 pan. To make removing the cake from the pan easier, you can line the bottom and two sides with parchment to form a sort of sling. Don’t forget to butter the parchment.

  1. Scald the milk. This makes the milk taste sweeter and, well, milkier. You can do this on the stove by putting the milk in a small saucepan and heating it until it has a skin on top, but short of a simmer. It will just be beginning to form tiny bubbles around the edges. The easier way is to put the milk, butter, and sugar in a glass container and microwave the whole works for about 3-4 minutes at high. Just to be on the safe side, I zap it for two minutes, check the temperature, and zap it for another minute or two.
  2. Let the milk/butter/sugar cool to lukewarm (skin temperature), then add the yeast and let it proof for five minutes or so. If your liquid is too hot, you’ll kill the yeast. If your yeast is good, it will go to town and end up looking like this
  3. Gently beat the eggs and add them to the wet ingredients.
  4. Sift the flour and salt together in your mixing bowl. If you are using a standing mixer, using the flat paddle, add the wet ingredients to the flour. If you are mixing by hand, make a well in the flour and add the wet ingredients.
  5. Mix everything just until it comes together into a ball. This doesn’t want a lot of kneading.DSC_0756
  6. Cover the dough and let it rise for at least an hour.
  7. While the dough is rising, peel, pit,  and slice your peaches. To peel the peaches, drop them, one or two at a time, into a pot of boiling water for 20-30 seconds then into a bowl of ice water to stop them cooking. Then you can just rub the peel off with a paper towel. Be careful. They are very slippery.
  8. Toss the peaches with the juice of 1 lemon (to stop them turning brown). You can add a little sugar here, but I don’tDSC_0751
  9. Roll out the risen dough into a rough rectangle slightly bigger than your pan, then press the dough into the pan with the dough going up the sides. Like this:DSC_0770
  10. Arrange the peach slices over the dough in one or two layers. I thought seven peaches were enough, but Simon wanted more. Use your judgement here. Or, you can throw in a handful of blueberries. The photo on the right is my first attempt — the one that exploded all over the oven — you can sort of see the signs already. But the combination of yellow and white peaches and blueberries was pretty, and tasty.
  11. To make the topping, sift together the dry ingredients, then stir in the melted butter with a fork. Mix it all up until the butter is well distributed. DSC_0769
  12. Spread the topping evenly over the peaches, then cover with a towel and let rise for another 30 minutes. This is a good time to preheat the oven, if you haven’t already.DSC_0773
  13. Bake the küchen in the 375/190 oven for about 40 minutes. The toothpick test is tricky, with all the gooey fruit. It should be done when the crust around the edges is nice and golden brown. If you did the sling thing, you can try pulling it up. If the whole thing sort of slumps in the middle, you might need a little more baking time.
  14. This is delicious hot, so you only need to cool it on a wire rack for a few minutes before you grab your fork, brew and cuppa, and eat Not-Quite-Tanta’s Peach Küchen.DSC_0774


Smoked Tomato Bisque with Roasted Corn and Zucchini: A Forty Day Invention Test, Episode One

I love smoke. I’m not advocating smoking. Don’t do it.Cigarette smoke is nasty. But, I have to confess an appreciation for the fragrance of good pipe tobacco or a fine cigar. My Uncle Chuck, though, smoked tobacco that smelled wonderful. A whiff of lovely pipe tobacco still makes my heart squeeze and I think of him. And miss him. The smell of a wood fire always smells like winter, and home. Here in New Zealand, lots of households still supplement their heating systems and hot water with wood-burning fireplaces. At the first cold snap, the air smells like hardwood smoke.

741173_10151779784298410_712962016_o-2

A mini Kale Whisperer with Uncle Chuck and his sweet-smelling pipe, circa 1958

I had a wood-burning fireplace in the basement of my house on Mt. Airey lane, but the chimney was three stories high (it was a row house) and didn’t pull very well. Every time I lit a fire, the house filled up with smoke, setting off all the smoke alarms, even the one the top floor — turns out the interior of the house pulled better than the chimney! I also discovered that wood smoke in large amounts gives me migraines. So the WBFP was replaced with a less evocative, but healthier gas fireplace.

Not only do I love the smell of smoke, I love the flavour of smoke. Smoked salmon, smoked cheese . . . smoked anything, really. Smoke is a boon to vegetarians. It is one of the ways to impart a rich, umami flavour to vegetables. I use smoke often in my cooking. I have a Camerons stovetop smoker that my Auntie Janice gave me for Christmas years ago.    If you don’t have an outdoor smoker or a stovetop smoker, though, there are lots of videos on You Tube that show you how to improvise one.


Whichever method you use, it is well worth adding smoking to your vegetarian cooking repertoire. In my first invention test, smoke lifted tomato soup to a new level.

Smoked Tomato Bisque with Roasted Corn and Zucchini

I started out with a kilo or so of tomatoes, half Roma sauce tomatoes (which they call “low acid” tomatoes here in New Zealand) and half regular old slicing tomatoes. The first step was to smoke the Romas. I smoke the Romas because they are meatier and seem to soak up the smoke better. I just sliced them in half, lengthwise, put them in the smoker, drizzled them with a little olive oil and tucked five cloves of garlic in amongst the tomatoes. The garlic smokes nicely and comes out sweet, not at all “garlicky”. These smoked over applewood chips for about half and hour and came out looking like this:
DSC_0763

In the interest of not overpowering all the other flavours with smoke, I roasted the slicing tomatoes, along with the kernels from two large ears of sweetcorn.

If you don’t have a stovetop smoker and can’t be bothered to improvise one, you can approximate the deliciousness by adding a teaspoon or so of liquid smoke. Then, you will roast all the tomatoes with the garlic.

Cut the raw kernels off the sweet corn. Don’t worry about getting every last little bit, because you are going to make a broth with the corn cobs. Just break the cobs in half and plunk them into a saucepan, add a little salt and sugar (which enhances the corniness of the corn, but is optional if you are really concerned about added sugar), cover with water and boil those puppies for twenty minutes or so. You can give the cooked cobs to your chickens. We have learned the hard way, however, NOT to give them to your dogs, no matter how much they promise not to yack them all up on your carpet!

DSC_0765

Line the baking sheet with foil so you can catch all the sweet roasting juices. Drizzle the tomatoes and corn with some olive oil and smoosh everything around to coat the veggies, sprinkle with a little salt and pepper, and roast in a 425F (220C) oven for 15 minutes, stir things around a bit and roast for 10-15 minutes more till it looks like this:

DSC_0766

The smoked and roasted tomatoes will slip right out of their skin. If you are sensitive to tomato seeds, you can also deglop them. I don’t mind the seeds, but I do like to remove the woody bit of the core that is right next to the stem. It’s not very nice. Put the tomato innards into a medium soup pot in which you have sweated two large chopped shallots or a small chopped onion with a Tablespoon of olive oil, along with the smoked garlic, a few kernels of the roasted corn, and the corn cob broth and simmer over low heat for a while. I like to keep it long and low, say 45 minutes, to really let the flavours combine.

While the tomatoes and broth are simmering, clean a couple of medium zucchini and halve them lengthwise. Remove about 2/3 of the roasted corn from the baking sheet. Smoosh the zucchini halves around in the oil and baking juices, put them cut side down on the sheet along with the rest of the corn kernels. Roast them in the same 425/220 oven for about 10 minutes, flip the zucchini over and roast for another 10-15 minutes, until the zucchini has started to brown. The corn kernels should be brown and crunchy. Cut the zucchini into chunks and set aside with the roasted (but not the crunchy) corn.

DSC_0768

Let the tomatoes cool a bit, add a handful of chopped herbs (basil, parsley, tarragon, mint, or dill — whatever you like) then puree everything in a blender, or in the pot with an immersion blender. If you want a creamier soup, you can add 1/4 cup or so of half-and-half or milk. To make a vegan soup, just throw a handful of the roasted corn in when you blend the soup to thicken it a bit.

Now, add the zucchini and the rest of the roasted corn and reheat everything gently (especially if you have added dairy). Stir in a Tablespoon or so of lemon or lime juice or white wine vinegar and garnish each bowl with some of the crispy roasted corn and some more fresh herbs — I used basil.


This is not your mother’s Campbells tomato soup, but it is just as yummy with a grilled cheese sandwich.

Ingredients:

This makes four main course servings, unless you’ve invited Simon over for dinner. Then it makes three. If you want more soup, just start with more tomatoes, zucchini, and corn.

1 1/2 kilos (or a little over 2 pounds) of ripe tomatoes, a mix of Romas and slicing tomatoes is nice

2 large shallots or 1 smallish onion

4 cloves of garlic, peeled but not chopped

2 large ears of sweet corn

2 medium zucchini

2 limes, 1 lemon, or white wine vinegar

Extra virgin olive oil

Fresh herbs of your choice (basil, tarragon, mint, dill, parsley)

kosher or sea salt and black pepper to taste

Liquid Smoke (optional)

DSC_0769


A Forty Day Invention Test

When I was a kid, my fellow Episcopalian and Catholic pals and I spent weeks thinking about what we would give up for Lent. I tended to lean toward such noble sacrifices as Brussels Sprouts — which as far as I remember my Mother never, ever cooked — or liver and onions– which my Dad loved meaning we had it about once a week. I tried very hard to score an invitation to eat at a friend’s house on those days. I remember being in awe of my best friend, Jeannie, the year she gave up watching TV.

I don’t honestly know whether she stuck with it for the whole 40 days, but I do remember her sitting with her back to the set on our regular Saturday Porter Wagner and hot dogs nights. My usual fall back was chocolate, which was sort of a sacrifice — I do like chocolate — but as we seldom had chocolate in the house, not much of one.

As I got older, the whole ritual of giving something up for Lent fell by the wayside. I guess this was because, once we moved to Georgia, most of my friends were Baptists and Methodists for whom Lent didn’t really seem much of an issue, although Easter certainly was.

Once I became an adult, I again embraced the notion of a Lenten discipline, Most years, I 21-days-to-form-a-new-habit-lori-welbournedecided to take up something — meditation, daily prayer, volunteering, swimming — in the hope that what started as a seasonal discipline would become a habit. It worked the year I challenged myself to go to the gym every day. I initially took up yoga as a Lenten discipline. That stuck too, for a while.

For several years, I gave up meat for Lent. This is, of course, a time-honoured Lenten discipline. The whole idea of Fat Tuesday or Pancake Day had to do with using up all your indulgent foods — butter, cream, eggs, bacon — in preparation for the lean, disciplined days of fasting that lay ahead. pancake day

For me, the Lenten meat fast would end with the Easter Vigil — the Saturday night service that begins in the dark (at least until Congress moved Daylight Savings Time, meaning it didn’t get dark at Easter until 8pm or so) with a cantor and Old Testament lessons and ends with with bright lights and festive music, representing Jesus’ resurrection. It is my absolutely favourite service of the entire year — far surpassing Christmas. One year, we were encouraged to make animal sounds during the Noah’s Ark story, rattle our keys during the reading of Ezekiel 37:1-14 — the Valley of the Dry Bones — and ring bells or toot horns during Psalm 98 — Sing to the Lord a New Song.

5guysburgerfries

No, I don’t eat meat anymore, but that doesn’t mean I don’t miss it.

After the Easter Vigil, I would head straight to Five Guys Burgers and Fries for a gloriously greasy bacon cheeseburger with the works and a bog of their miraculously delicious fries then head home to eat it accompanied by a bottle of bubbly. Now that’s breaking a fast!

One year, I gave up wine. I’ll never make that mistake again.

Ditto: coffee.

mobyAnother year, I pledged to read Moby Dick, my lifelong literary bête noir. The. Most. Boring. Novel. Ever. Written. I failed. I’d rather spend forty days wearing a hair shirt. Note to l’Académie française: I’ll give up my circonflexe when you pry it from my cold, dead fingers. If for no other reason, because without it, my spell checker keeps changing bête to bets or beets.je suis circonflex

My friend Mary earned my everlasting admiration the year she gave up baking bread for Lent. When we were preparing to move to New Zealand and it came time to find a foster mother for my beloved sourdough starter, I reckoned that someone who loved baking so much that she would give it up for Lent would treat my sourdough baby with all the love it deserved.

God and I had a parting of the ways some years ago. I am now what I call a philosophical Christian, with some Judaism, Buddhism, and Church of the Flying Spaghetti Monster mixed in. While I no longer believe in an afterlife or a loving God, I still believe that Jesus’ teaching — the stuff he actually said — is as good a guide for living a decent and rewarding life as any other. Feed the hungry. House the homeless. Care for the sick. Embrace outsiders. Keep only what you need and share the rest with those who have less than you. Judge not lest ye be judged. This is all good. Are you listening, Donald Trump?

This Lent, a year after my soul fell to pieces, I am once again embracing the value of a discipline for restoring mindfulness and spiritual resilience. For most of the last year, just getting out of bed was an exercise in discipline. It would be disingenuous for me to give up meat — that is already gone. Chocolate? Not enough of a sacrifice. Wine? lentToo much of a sacrifice. As much as I admire Mary, giving up baking would rob me of one of my most important emotional outlets. Simon and the boys might appreciate my giving up the accordion, but I wouldn’t want to lose my place with my lovely accordion teacher, Katie. The Kale Whisperer can’t give up Kale.

So, what’s a girl to do?

After long deliberation and utterly without consulting my devoted partner, I have decided to give up cookbooks for Lent. Not only will I not buy any new ones, I won’t use them. For the next forty days, I will be a totally improvisational cook. Because this is my discipline and I’m making the rules, I will leave myself three exceptions. I’ll allow myself to use Karen Page’s The Vegetarian Flavor Bible [see “The Seventh Cookbook of Christmas”], to ensure I check before pairing radishes and chocolate. I’ll also allow one all purpose book to look up basic recipes, like choux pastry, that I don’t carry around in my head. For this, I’ll use Mark Bittman’s How to Cook Everything Vegetarian. I’ll also use cookbooks for any pickling and preserving I do because I don’t want to kill anyone. Starting at sunrise on Ash Wednesday until sundown Easter Saturday, all other cookbooks will remain closed.

Note that I am giving up cookbooks, not necessarily recipes. In addition to improvising my own recipes using whatever seasonal ingredients are available, I will, on occasion, revisit some of the old recipes I inherited from my mother, Aunties, Grandma, and Tante Ida. I hope, in so doing, I will stretch my kitchen creativity as well as knitting my cooking more tightly to my new home.

I pledge to include ingredients that are new to me: Maori yams, feijoas, Asian greens. Maybe even these things. weird fruit

My hope is that at the end of this exercise, I will have a greater appreciation for living in tune with the seasons, greater culinary creativity, and a better food blog.

I’ll share the successes. When there are failures — as there are bound to be — I’ll share those, too. I promise, though, that I’ll only consult the ones I have on paper. Consulting the internet; that would be cheating. I am setting off on a forty day Master Chef Invention test. The Pantry is open.

invention test


The Seventh Cookbook of Christmas: The Vegetarian Flavor Bible

flavor bible

I want to be Australia’s next Masterchef. This is highly unlikely for at least two reasons. First, I don’t live in Australia. Second, the Masterchef competition is extremely vegetarian unfriendly. Last week, the contestants were required to essentially butcher a lamb carcass. One of my favourite Masterchef moments occurred in the 2014 competition when nearly-vegetarian Renae Smith reacted the way I have would when she discovered a whole eel in her mystery box — tears, panic attack, and horror.  It was clear she wasn’t going to be able to go through with her cook when my favourite contestant of the seasons, Colin Sheppard rode to the rescue and offered to give up some of his cook time to clean and filet the horrifying primal beast. Filleted, the meat didn’t trigger her phobia, and Renae was able to cook. I was heartbroken when Colin went home.

Which points, perhaps, to a third reason I’ll never be Australia’s (or anyone else’s) next Masterchef: Colin, 51, was referred to as “Pappa”. A similarly gentle male contestant, Richard Harris, 55, chose eel for an invention challenge because he reckoned the other contestants might find it intimidating. Richard was eliminated from 2015’s New Zealand Masterchef to questions about why he waited until it was too late in his life to pursue his dream. <sound of gnashing teeth and forehead pounding on desk> Colin and Richard: You are Masterchefs in my heart!

Masterchef New Zealand has been cancelled; so, it looks like I must settle for being an armchair master chef. When the contestants are set invention tests or mystery boxes, Simon and I play “what would you cook?” This works out nicely for me, of course, because my imagined masterpiece is always tastier and more spectacularly beautiful than anything the contestants put up.

OK. Today’s mystery box ingredient is: KALE. What would you cook?

IMG_1217

The Kale Whisperer’s Seventh Cookbook of Christmas will help you figure that out, whether you are practicing for Masterchef, or not. Although, if you are, I would advise studying this book front-to-back and side-to-side. Karen Page’s The Vegetarian Flavor Bible (Little Brown, 2015) is subtitled “the essential guide to culinary creativity.” And it is all that. This is my second non-cookbook Cookbook of Christmas, but if I had to pick a desert island cookbook, this would be it. With this cookbook, you don’t need cookbooks at all, really.

Page’s goal in compiling this guide, which is both informative and simple to use, was to provide useful nutritional and health information for those seeking to either to become vegetarians or shift to a whole-foods, plant-based diet, with our without occasional meat. Her first two chapters — For the Love of Plants, and Maximizing Flavor — make the case for a plant-based diet and chronicle the shift of vegetarian cuisine from the counter-culture to the mainstream. Of particular interest to me were the comments from some of America’s top chefs who, increasingly, are shifting toward culinary styles that depend more and more heavily on vegetables as the focus rather than the background.

Page’s discussion of the key elements of flavour in vegetarian cooking is eye opening, even for the most experienced cook, and has vastly increased my confidence as an improvisational cook. The formula? Flavor = Taste + Mouthfeel + Aroma + The X-Factor (senses + heart, mind, spirit).  She even has a handy “craving” table.  Vegetarian? Craving crab dip? Add some kelp and Old Bay Seasoning to your favourite white bean dip. Miss that magic zing of anchovy paste? I know I do. Use dark miso paste. I’m not a fan of play meat, so her suggestions of tofurkey and Soyrizo leave me cold. But most of the suggestions here are at least worth a think.

All this information is fascinating, and important to know, but the part of  The Vegetarian Flavor Bible  that you will use often — in my case, daily — is the “A to Z Listings.” It is truly exhaustive. You won’t find some local specialties here. No feijoas but you will find their cousin, guava. So far, I haven’t stumped this list. And I’ve tried. Each listing starts with some general information: nutrient concentration, season, flavour, volume (flavour loudness), what it is, nutritional profile, cooking techniques, tips, and botanical relatives. Look up Kale, and here is some of what you will learn: kale is a leafy, green vegetable, it has an extremely high nutrient content, it’s bitter but can be sweet in winter, it’s 72% carbs / 16% protein / 12% fat,  and 1 cup of raw, chopped kale has 35 calories and 2 grams of protein. Kale likes to be blanched, boiled, braised, grilled, slow cooked, marinated, pureed, eaten raw (but I’m not a fan, unless its very young and tender), sautéed, stewed, steamed and stir fried. Kale’s cousins include broccoli, Brussels sprouts, collard greens, radishes, and watercress.

What you will also learn is anything and everything that matches well with kale. Page built her flavour suggestions through an exhaustive compilation of  recommendations and wisdom of hundreds of American cooks and chefs specialising in cuisines from around the world. There is a ranking system for the flavour matches. Flavour matches recommended by at least one expert appear in normal type. BOLD CAPS indicate recommendations made by a larger number of experts. BOLD CAPS with an asterisk (*) are what Page calls “Holy Grail” pairings — most highly recommended by the largest number of experts. Particular types of preparations (soups, casseroles) and cuisines use of an ingredient appear in italics. Those in bold italics or BOLD ITALIC CAPS are those most highly recommended for the particular ingredient.

What will I cook with my Kale? Were it winter, I might make a hearty soup or my favourite lentil and kale spag bol. But it is early summer here in New Zealand, so I’m thinking a frittata or stir-fry. Maybe a salad. I look up kale and find that some of its strongest flavour partners are beans, chilli, garlic, lemon, olive oil, and red onions. As I’ve mentioned before, I don’t care for raw kale, no matter how long you massage it. But if it is young and fairly tender, all it needs is a quick blanch. I’m thinking a salad of blanched kale tossed with a dressing  of lemon juice, olive oil, some thinly sliced new season garlic, a pinch of dried chilli to give it some bite, salt and pepper. I’ll marinate some white beans in the same vinaigrette (minus the chilli)  and some chopped fresh oregano from my garden and a thinly sliced red onion. Then I’ll make a composed salad of the dark green kale, the white beans and red onions, with some crispy parmesan croutons made with the end of the loaf of sourdough bread I baked last week.

I’ll let you know if the judges like it!

brain

The Perfect Pizza Crust: A Tutorial

Making your own pizza crust has numerous advantages that you’ve heard dozens of times before: its cheaper than restaurant pizza, it doesn’t have lots of baddititives, you can control the fat, salt, and sugar content, and you can top it with whatever you like. Even potato chips and pickles.

It is also fun and rewarding.

And if you serve it to your non-pizza-crust making friends, they will say “ooh and ahh” (because they will be too busy chewing to say more), and everyone will think you are very clever, indeed!

I have settled on a few basic things that you must remember when making your own version of perfect pizza crust:

  1. You can make pizza crust at the last minute, but you cannot make perfect pizza crust at the last minute. You must plan ahead, at least 24 hours. They key to pizza crust that is the perfect combination of blistery, crispy, and tangy is time. But it takes less than five minutes to set the dough up, and then it just sits happily in your fridge for a day or two. Then, on the day you are planning to bake it, take the dough out early in the day and let it lounge around in your kitchen until it looks like a science experiment. This was, until recently, the greatest barrier to my achieving pizza crust nirvana.
  2. Use plain old unbleached all-purpose flour. Bread flour has too much gluten and will make your crust harder to stretch and tougher. Fancy pizza flour blends are not worth the extra cost. And weigh your flour. That way the ratio of dry to wet ingredients will always be right.
  3. Stretch your pizza dough onto a sheet of parchment or baking paper, and let it rest there. When its ready to bake, you can just shift the paper on to a baking sheet or pizza peel, and shift it directly onto the pizza stone. Don’t let anyone persuade you that you can do the same thing with cornmeal. It will end in tears. And who wants uncooked cornmeal all over their pizza crust?
  4. Use a pizza stone, or baking tiles. The key to perfect pizza crust is to cook it fast at very high heat. If you don’t have a pizza stone and are too poor to go to the building supply store and buy a few unglazed ceramic tiles, you can start the pizza on a baking sheet and the transfer it midway through baking directly on to the oven rack. I leave my pizza stone on the bottom rack of my oven all the time.

So, here’s the drill:

Start by putting 1 teaspoon (5 ml) of active dry yeast in 1 1/4 cups (355 ml) warm (verging on hot) tap water. Don’t use quick rise (bread machine) yeast. Set it aside and let the little yeasties wake up and start farting. After a few minutes, it will look like this:

IMG_0198

Measure 497 grams of all purpose flour into the bowl of a standing mixer or food processor. That’s 3 1/2 cups if you don’t have a kitchen scale.

IMG_0196

Add 1 1/2 teaspoons (7.5 ml) salt (I used pink salt here, but kosher, table, or fine sea salt work just as well)

IMG_0197

When the yeast has demonstrated its liveliness, add 2 Tablespoons (30 ml) of extra virgin olive oil. You’ll end up with a bubbly concoction that looks like this:

IMG_0199

Attach the paddle to your mixer (or the metal blade, if you are using a food processor) and run, or pulse it for a few seconds to incorporate the salt and flour. Then, gradually (but not too gradually) pour in the water/yeast/EVO mixture.

Some recipes will tell you to add the flour to the liquid, but I find adding the liquid to the flour just works better.

Let the mixer run until the dough starts to come together into a shaggy glob. It won’t really come together in a smooth ball — if it does the dough might be a bit dry. It should pretty much clean the sides of the bowl, though.

IMG_0200 IMG_0202

At this point, you can take the dough out of the bowl and put it on a well-floured surface. It will look a mess:

IMG_0203

Now, gently knead the dough for just a few turns to coax it into a smooth, but still slightly sticky ball:

IMG_0209 IMG_0204 IMG_0206

Put your lovely batch of pizza dough into a plastic bag and pop it into the fridge, like this:

IMG_0207

Go to bed.

When you wake up the next morning, you’ll find those little yeasties have been doing their thing all night, and your fridge now looks like this (this is a real, untouched photo):

IMG_0208

This recipe makes enough dough for two good-sized pizzas, so at this point, you want to take the now risen and VERY sticky dough out of its overnight bag, knead it down a few turns, and divide it into two more-or-less equal parts (the kitchen scale helps here):

IMG_0210

If you are only making one pizza today, put the second ball of dough back in its overnight bag and into the fridge to become pizza another day. Take the lucky ball of dough, that gets to be pizza today, and put it in an appropriately-sized bowl with a bit of EVO. Twirl the dough around in the EVO to get it nice and oiled up. Cover that baby up with some plastic wrap and put it in a nice warm place until about an hour and 30 minutes before you plan to bake your pizza.

IMG_0211

By then, your dough will have risen away happily and look like this:

IMG_0212

Turn your oven on to 260C or 500F, or as hot as it will go. Make sure your pizza stone is in the oven, if it doesn’t live there. You want that puppy HOT.

Turn the dough out of the bowl onto a well-floured surface and gently knead it a few more turns, just to incorporate the oil and get it back into a more compact ball. Then cover it with plastic wrap and let it rest for at least 30 minutes, and up to an hour.

Now, it’s time to stretch your crust. Start with your nicely-rested dough and shape it into a rough circle, like this:

IMG_0213

Then move it over to a sheet of parchment. Making generous use of flour, stretch the dough into the appropriate shape and size. Or you can toss it, but if you know how to toss pizza, you probably don’t need my help. If the dough is being stubborn, you can use a rolling pin, but try not to. My oven is tiny, so to achieve maximum pizza surface area, my pizzas are ovally rectangles:

IMG_0214

Now it needs to rest again, for 30 minutes or so. And it is ready to bake. I always pre-bake my crusts for about 5 (no more) minutes before I put on the toppings. It keeps the crust from getting soggy. You can brush it with olive oil, but I don’t. Just slip the crust and the parchment on to a flat baking sheet or pizza peel, then directly on to the baking stone. It will get lots of fun bubbles on the surface, but you can press those back down when you take it out to put on the toppings.

DSC_0937

After this initial baking, you won’t need the parchment to move the crust around, so just slide it back on the baking sheet or pizza peel and put on your chosen toppings. I usually start with the thin layer of cheese, but you know what you like.

DSC_0939

Put the assembled artistry back into the hot oven for another 8 minutes or so.

Take it out of the oven.

IMG_0192

Slice it.

IMG_0123

And eat pizza.